
At its core, DevOps means applying best practices to automate the process between development and IT teams. In practice, DevOps requires automating the app builds, running tests to verify source code integrity, and automating the release process until the app is ready for deployment.
With the advent of automated visual UI testing, people went about discovering the best way to integrate Automated Visual Testing in the DevOps workflow to speed up the process.
Bilal Haidar
Continuous Integration / Continuous Delivery (CI/CD) makes up the heart of the DevOps workflow that supports the processes, developers, testers, and clients.
With the advent of automated visual UI testing, people went about discovering the best way to integrate Automated Visual Testing in the DevOps workflow to speed up the process.
In this article, I will share the workflow I use to integrate my source code with a CI/CD service to build the code and run the automated visual UI tests. And, I will show the end result – a full integration between the source code management system, and CI/CD, to report any discrepancies or failures in either.
The other half of this article will demonstrate a practical example of implementing a recommended Visual Testing Workflow.
While doing so, we will be covering topics like CI/CD, Source Code Management systems, and much more.
Let’s start!
Where do you store your source code? Many of the external source code repository management (SCRM) systems make your code available to your team wherever they are and whenever they need access. Popular SCRM systems include GitHub, BitBucket, GitLab and Azure Repos. If you don’t already use one or more SCRM systems, I highly recommend you start
SCRM underpins DevOps source management. For example, I can add or modify code and push the changes to the centralized repository. My colleagues elsewhere would do the same thing. Developers joining the team can clone the centralized up-to-date repository to begin coding instantaneously.
SCRM systems have developed best practices and workflows. For instance, the diagram below depicts the workflow of implementing a new feature in your application.
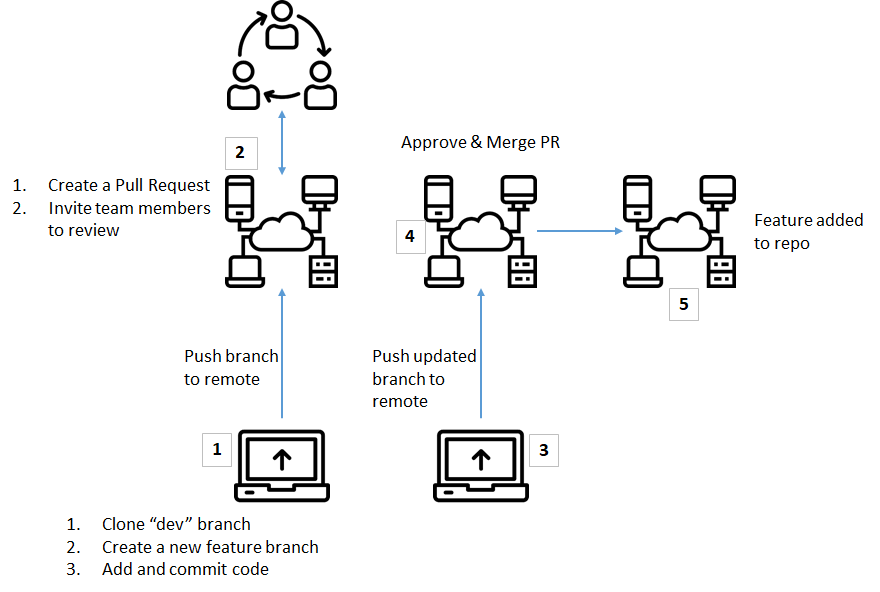
Start by cloning or branching to the dev branch.
I use this typical SCRM Workflow on a daily basis. It’s quite simple and straight to the point, yet it organizes the development process with all team members without losing code or overlapping.
Continuous Integration, or CI for short, is a fully-automated development methodology that seamlessly integrates your daily code changes into a centralized source code management system. CI ensures a high level of code integrity by enforcing your own software development process for any code changes.
When employing CI in your development workflow, creating a new PR in your SCRM system triggers the CI workflow via a webhook more often than not.
The CI workflow is depicted in this diagram:
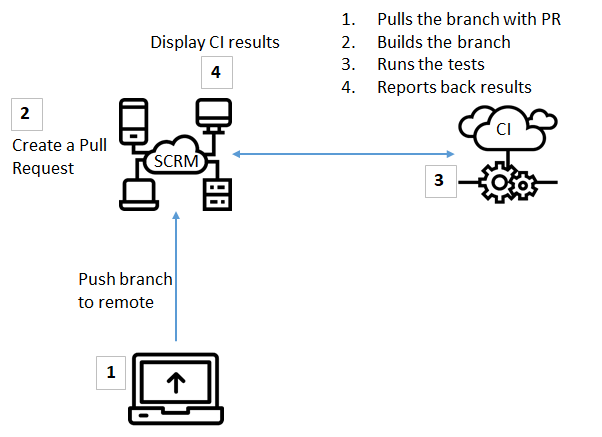
The CI results will be either a success or failure. In case of a failure, you need to review the PR and fix any issues reported. Otherwise, you can safely merge the PR into your code.
On the other hand, the Continuous Delivery, or CD, automates the process of generating a releasable package from your code. The success results of the CI process triggers a Release Pipeline inside the CD Provider. I won’t be covering CD in this article. To find out more about CD, you can read this detailed guide on CD/CI: What’s Continuous Integration and Continuous Delivery.
Automated visual UI testing and CI/CD integrate well together! They complement each other and facilitate the work of DevOps.
Once you have an automated integration and delivery solution, you can easily integrate visual UI tests into your CI/CD workflow. Simply add an additional task in the workflow to run the visual UI tests. Typically, the CI Provider runs the automated tests and sends the results to the Visual Testing Provider. The Visual Testing Provider analyzes the testing results and reports them back to the SCRM on that specific PR.
The diagram below summarizes this whole workflow:
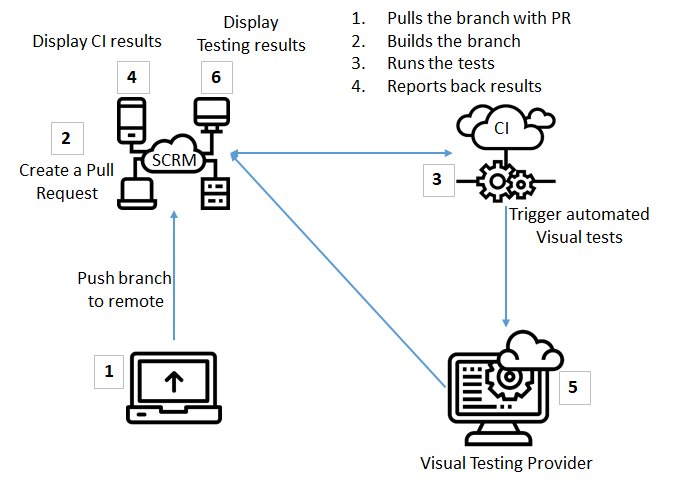
Every Visual Testing Provider supports an SCRM system integration to ease communication when running visual UI tests. For instance, Applitools offers GitHub, BitBucket, and other integrations with SCRM systems.
Let’s see this workflow in action in the demo section.
Now that we know where automated visual UI testing fits in the DevOps workflow, let’s work through an example by trying to automate the entire Visual Testing Workflow.
In this step-by-step guide, we’ll tackle the following:
For this article, I opt to use the source code that I developed for my previous article Cross-browser Testing With Cypress.io. The code contains a single visual UI test that runs against one of the Applitools customer’s website- the https://www.salesforce.com– and fills the contact form located at https://www.salesforce.com/uk/form/contact/contactme/.
Start by cloning the source code that we’re going to use for this demonstration by running this command:
git clone git@github.com:bhaidar/applitools-github-circle-ci.git
The command clones the GitHub repo to your local computer. Once the code is cloned, enter the applitools-github-circle-ci directory, and run the following command to install the packages:
npm install
This command installs all the necessary NPM packages used by the source code. The app is now ready!
Before you can locally run Applitools Eyes Cypress SDK, make sure you get an Applitools API Key, and store it on your machine as an environment variable.
To set the APPLITOOLS_API_KEY environment variable, you can use the export command on Mac or set command on Windows as follows:
For this tutorial, we’re going to integrate with our GitHib repo with CircleCI. If you’re not familiar with CircleCI, check out their documentation and sign up for a free account with GitHub or Bitbucket.
Once you’ve created an account and logged in to the CircleCI website, click the Add Projects menu item.
Search and locate your GitHub repo and click the Set up Project button as shown in the diagram.
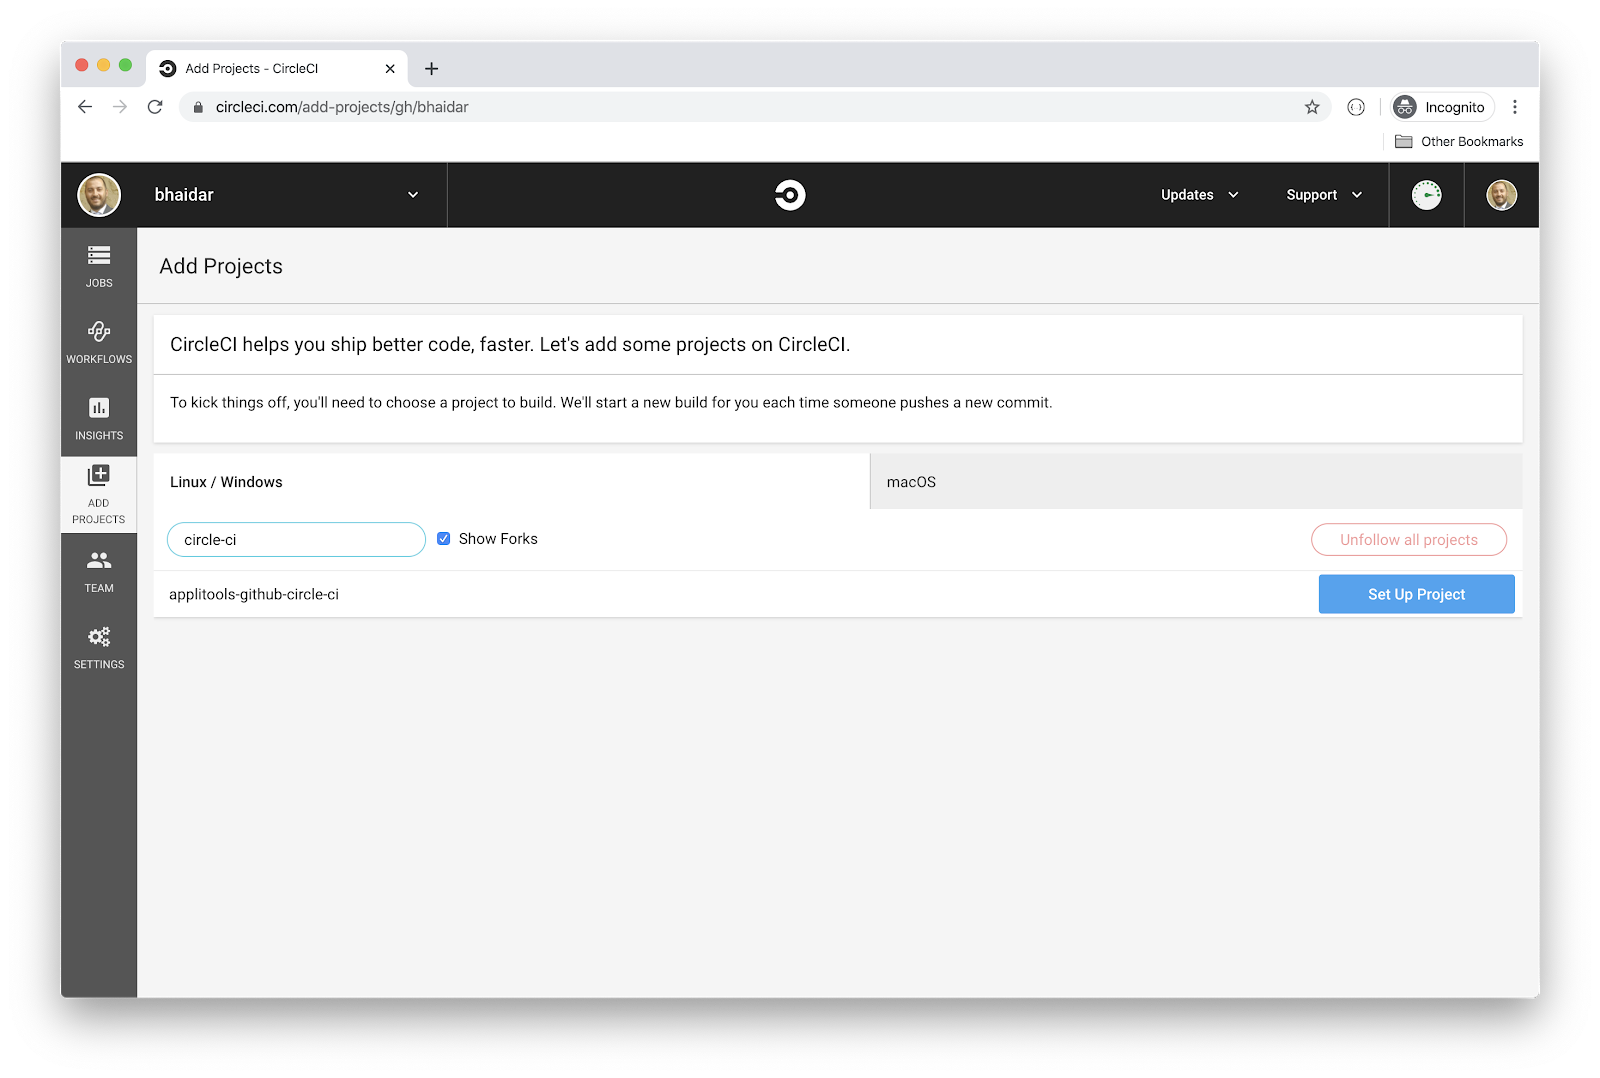
You are then redirected to the Project Settings page to complete the set up of your project.
On the Project Settings page, select the Linux operating system option and Node as a language. Scroll down the page until you see:
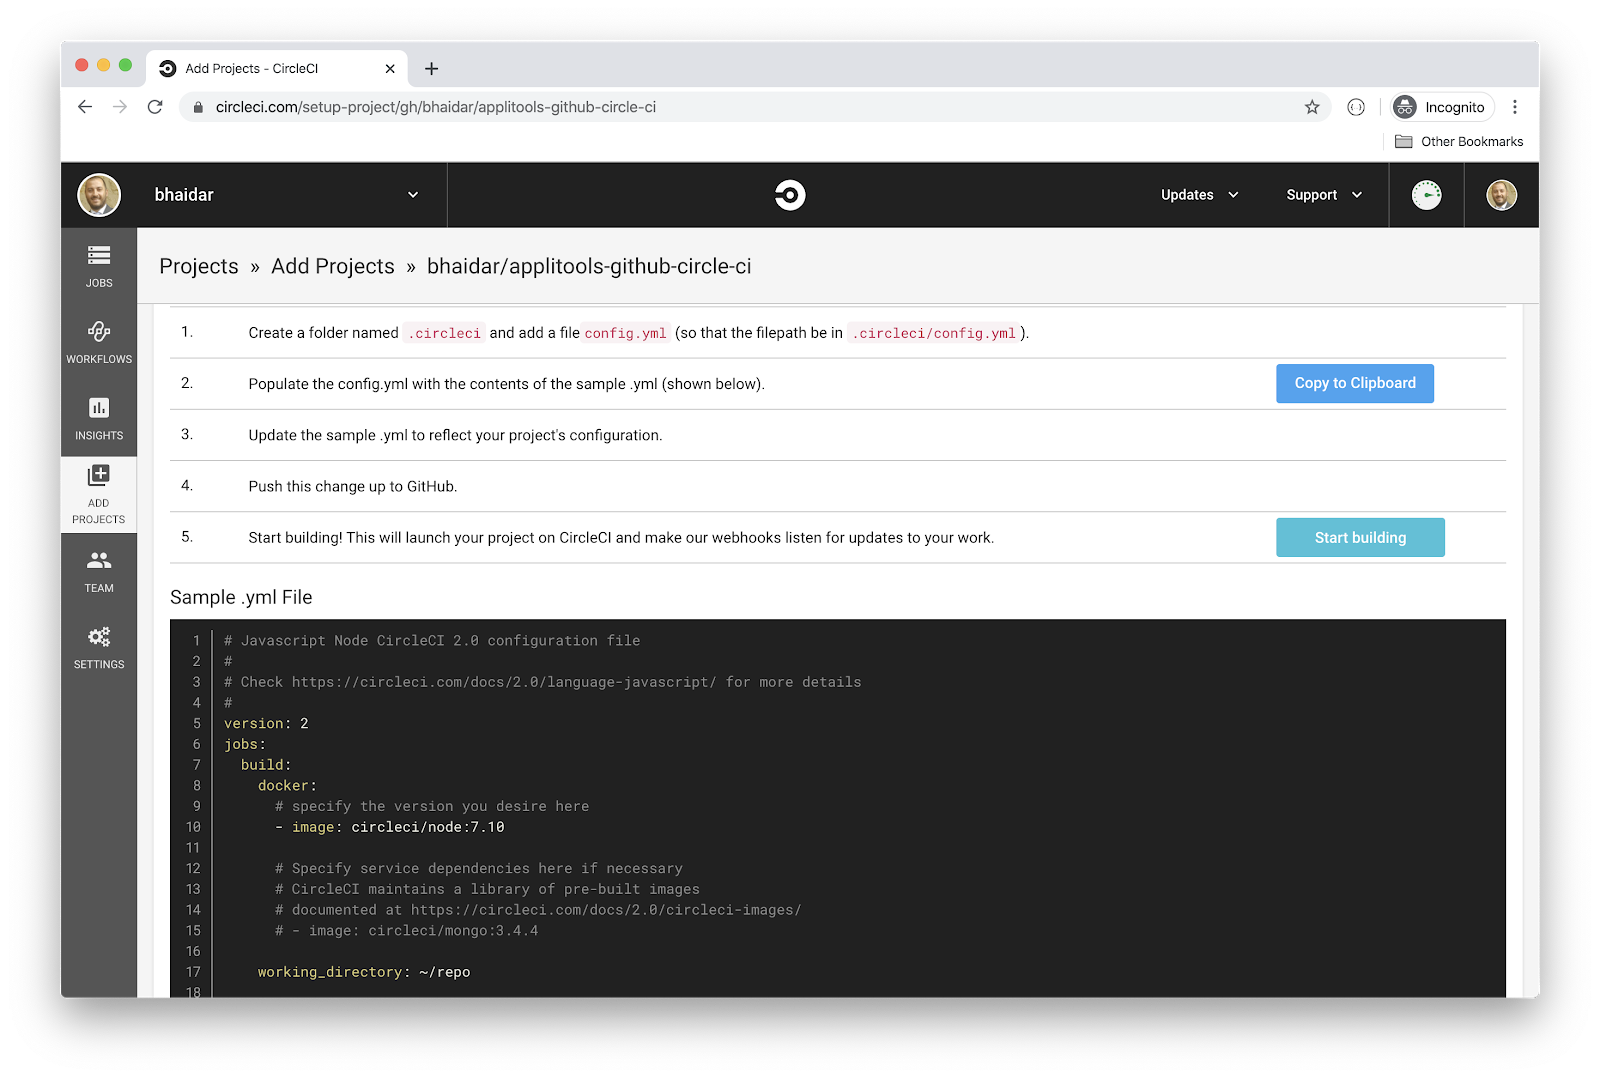
The CircleCI team offers you a step by step guide on how to integrate CircleCI into your application. Make sure you follow the steps listed as shown here:
Switch back to your code editor and let’s add the CircleCI requirements.
Start by creating the dev git branch by running the commands below:
git checkout -b dev
git push --set-upstream origin dev
Then create a new folder named .circle at the root folder of the app. Then create a new file inside the .circleci folder named config.yml.
The CircleCI provides a sample config.yml file that you can use to start working with CircleCI. For now, paste the following inside the config.yml file:
The “config.yml” defines a single build job. The build job defines some general configurations and some steps.
This job makes uses of the cypress/base:10 Docker image. It also defines the working directory to be the name of the app itself.
The build job steps are:
It’s very important to include both commands, exporting the APPLITOOLS_BATCH_ID environment variable, and running the visual UI test, in the same command inside the config.yml file.
In addition, we need to amend the applitools.config.js file to include the batchId. The applitools.config.js file should now look as follows:
module.exports = {
    showLogs: false,
    batchName: 'Circle CI batch',
    batchId: process.env.APPLITOOLS_BATCH_ID
}
One task remains – adding the APPLITOOLS_API_KEY environment variable on the CircleCI project level, so the visual UI tests can run and connect with Applitools servers. You have the choice to either place this environment variable inside the config.yml file or add the environment variable on the CircleCI website. The latter is best and the recommended option so you don’t share your API on GitHub. You simply embed it at the CircleCI project level.
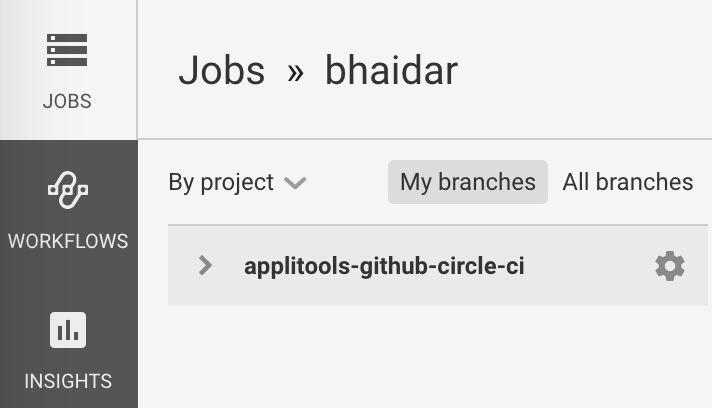
Now let’s push these changes to our local copy of source code to GitHub. Automatically, CircleCI will detect a change in the repo and will run the test job. Consequently, the Applitools visual UI test will run.
Run this commands to push your changes to GitHub:
git add .
git commit -m "Add CircleCI support to app"
Switch back to CircleCI and check the status of the job.
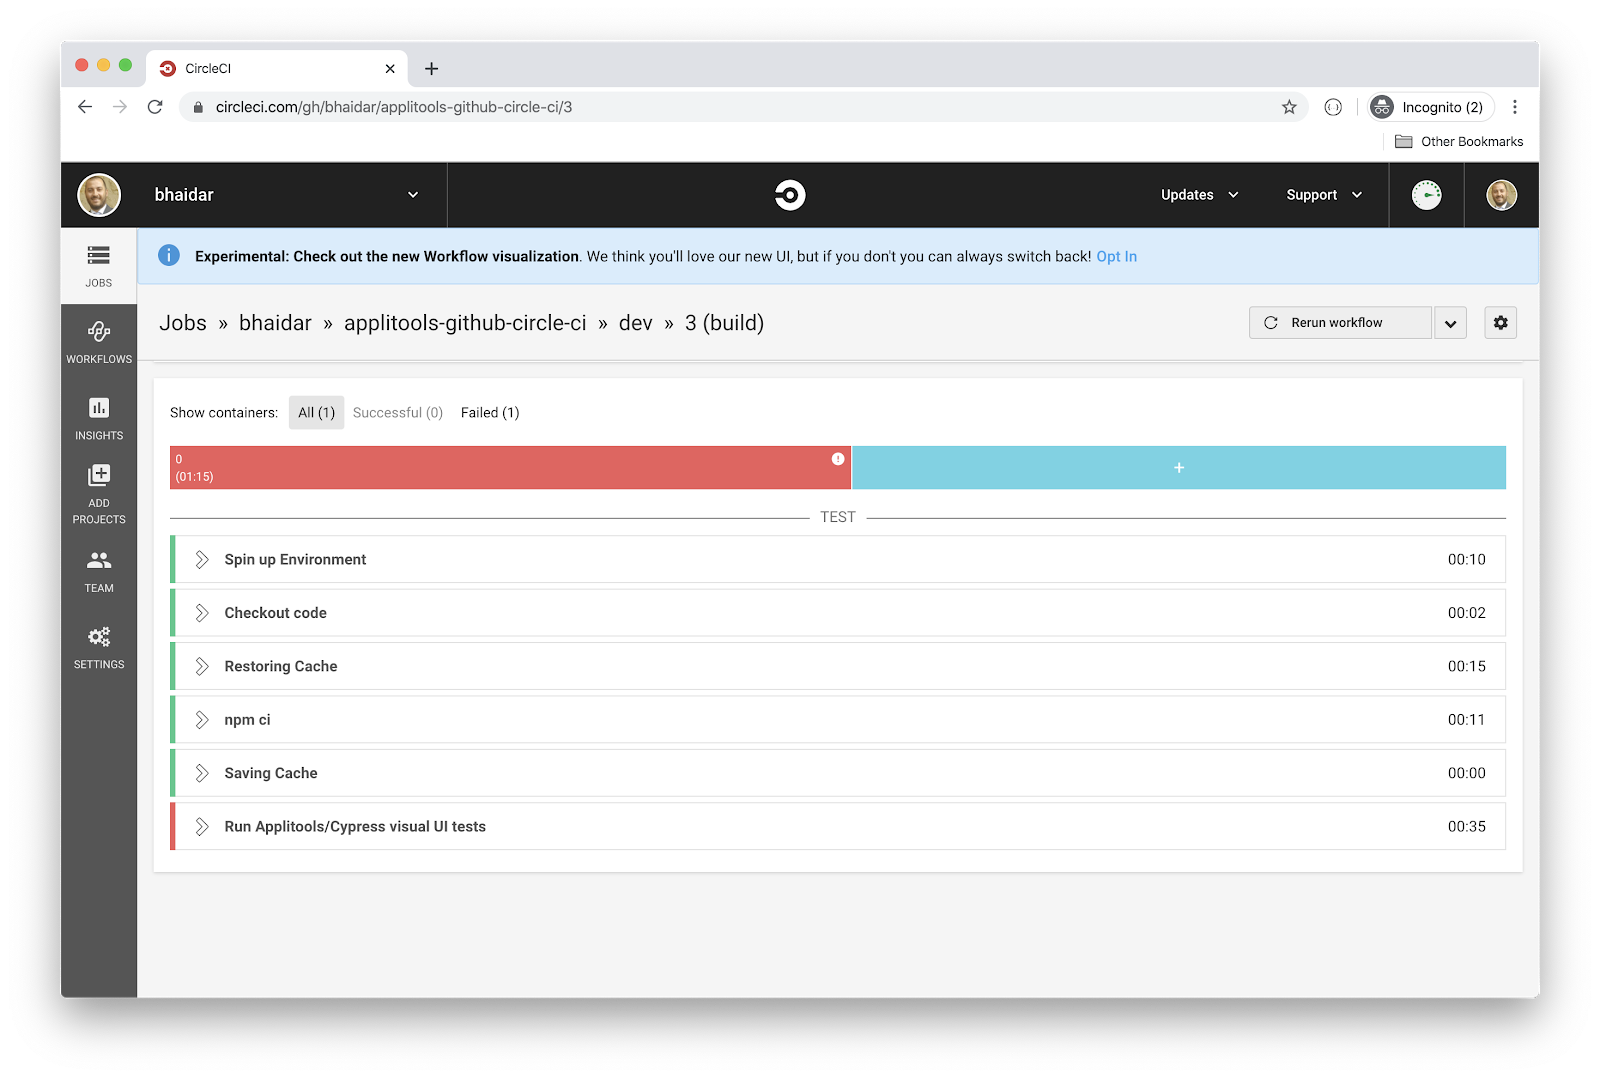
The diagram lists all the steps as defined in the config.yml file. CircleCI runs each step in the same order it appears in the config file.
The job fails! Let’s expand the last step to find out why.
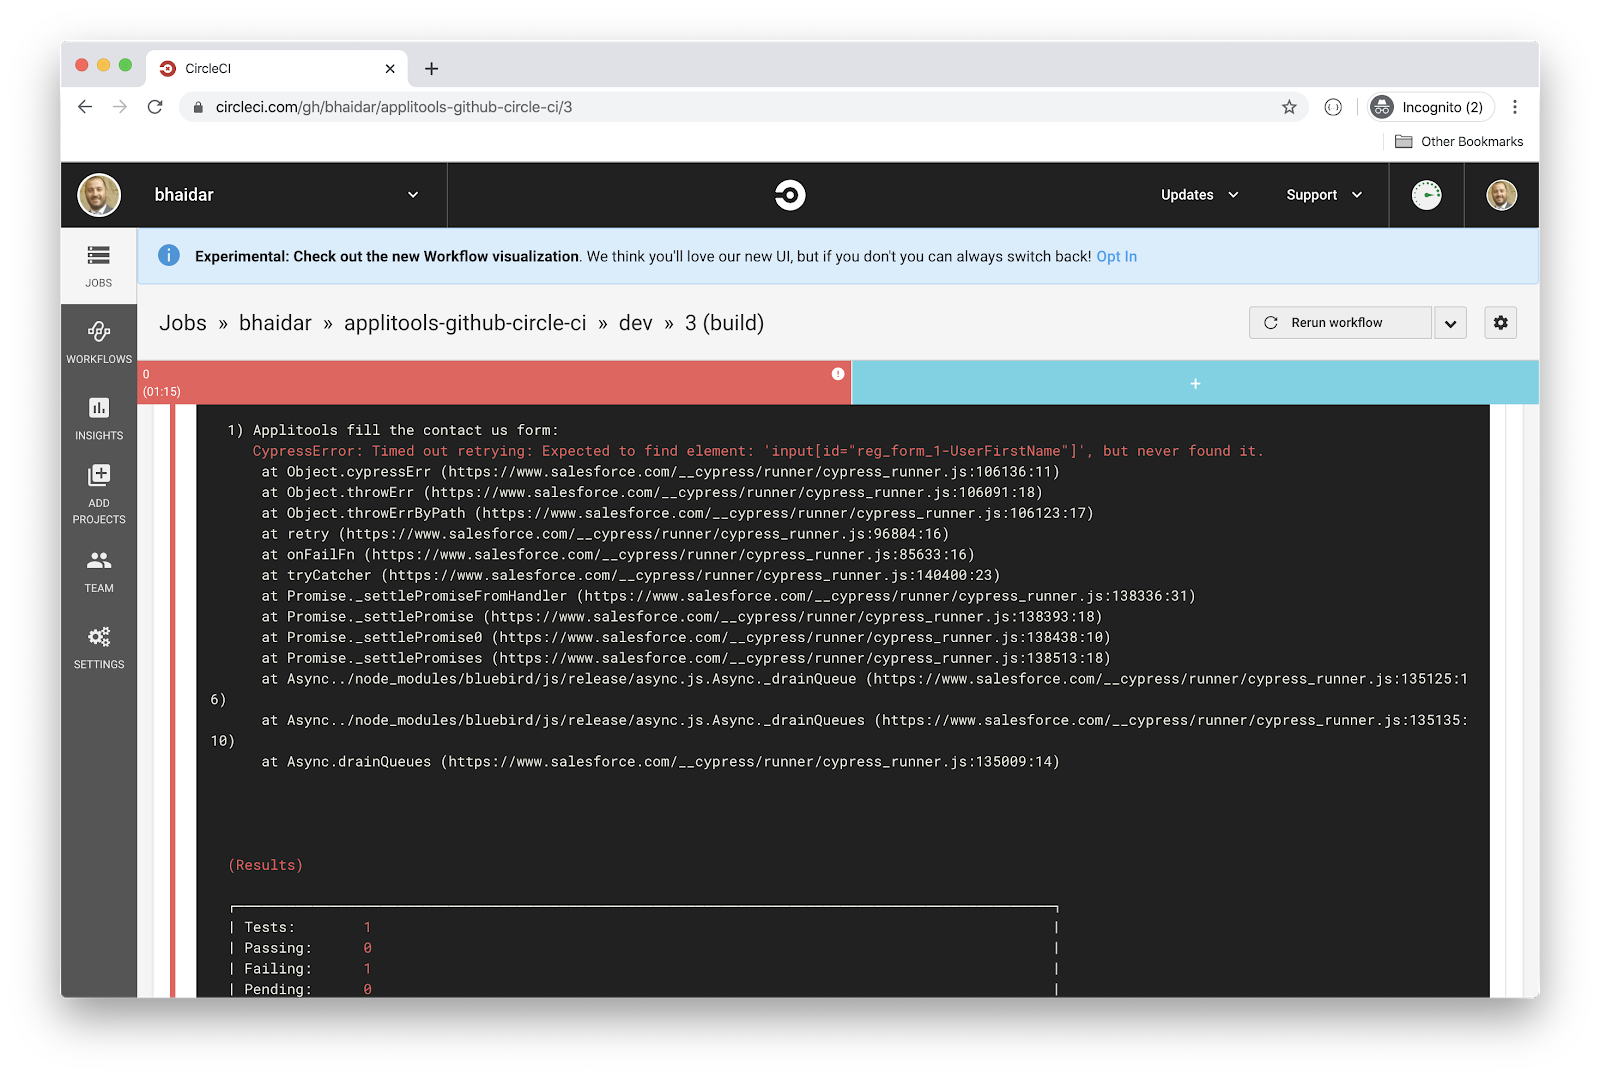
If you read through the logs you will notice the following:
CypressError: Timed out retrying: Expected to find element: 'input[id="reg_form_1-UserFirstName"]', but never found it.
Cypress.io has generated an error as it cannot find an input with ID reg_form_1-UserFirstName on the contact form.
The SalesForce team has changed the IDs of the contact form since I wrote the visual test script in my previous article!
Don’t worry, we will fix this in the coming sections. More importantly, we have linked our GitHub repo with CircleCI.
Let’s move on and tackle other tasks.
Before we proceed, let’s configure our GitHub repo with the best practices.
That’s it for GitHub!
Let switch to CircleCI and configure one option there.
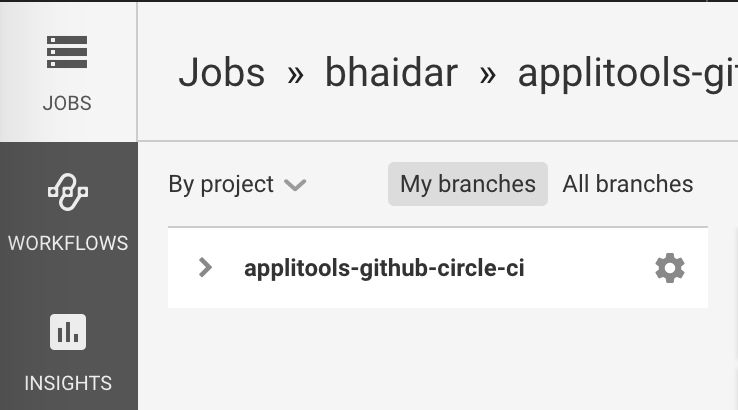
That’s it for CircleCI!
So far, we have managed to integrate CircleCI and GitHub successfully. Any status update on running the build job on CircleCI will be reflected on the GitHub repo.
Let’s now integrate GitHub with Applitools so that our GitHub repo will receive any status updates on whether the visual UI tests ran successfully or failed.
Go to the Applitools Test Manager website and log in with your GitHub credentials.
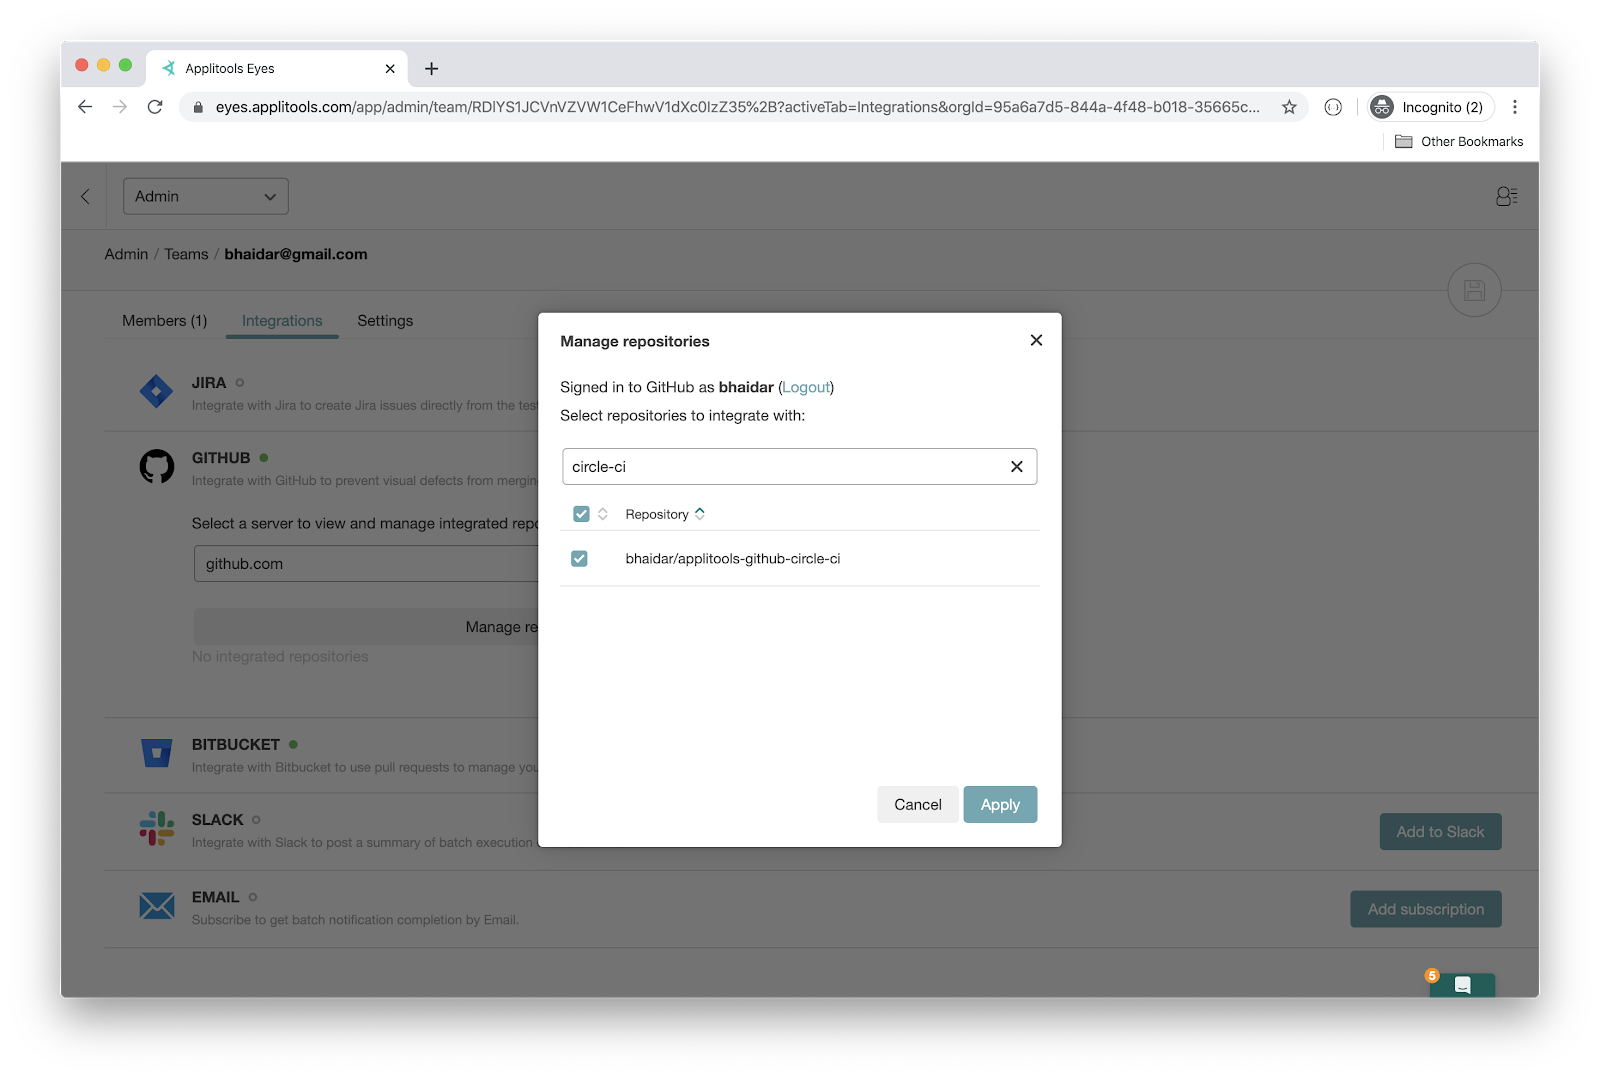
That’s all! Now any status updates on visual UI tests on the GitHub repo you’ve selected will appear right away.
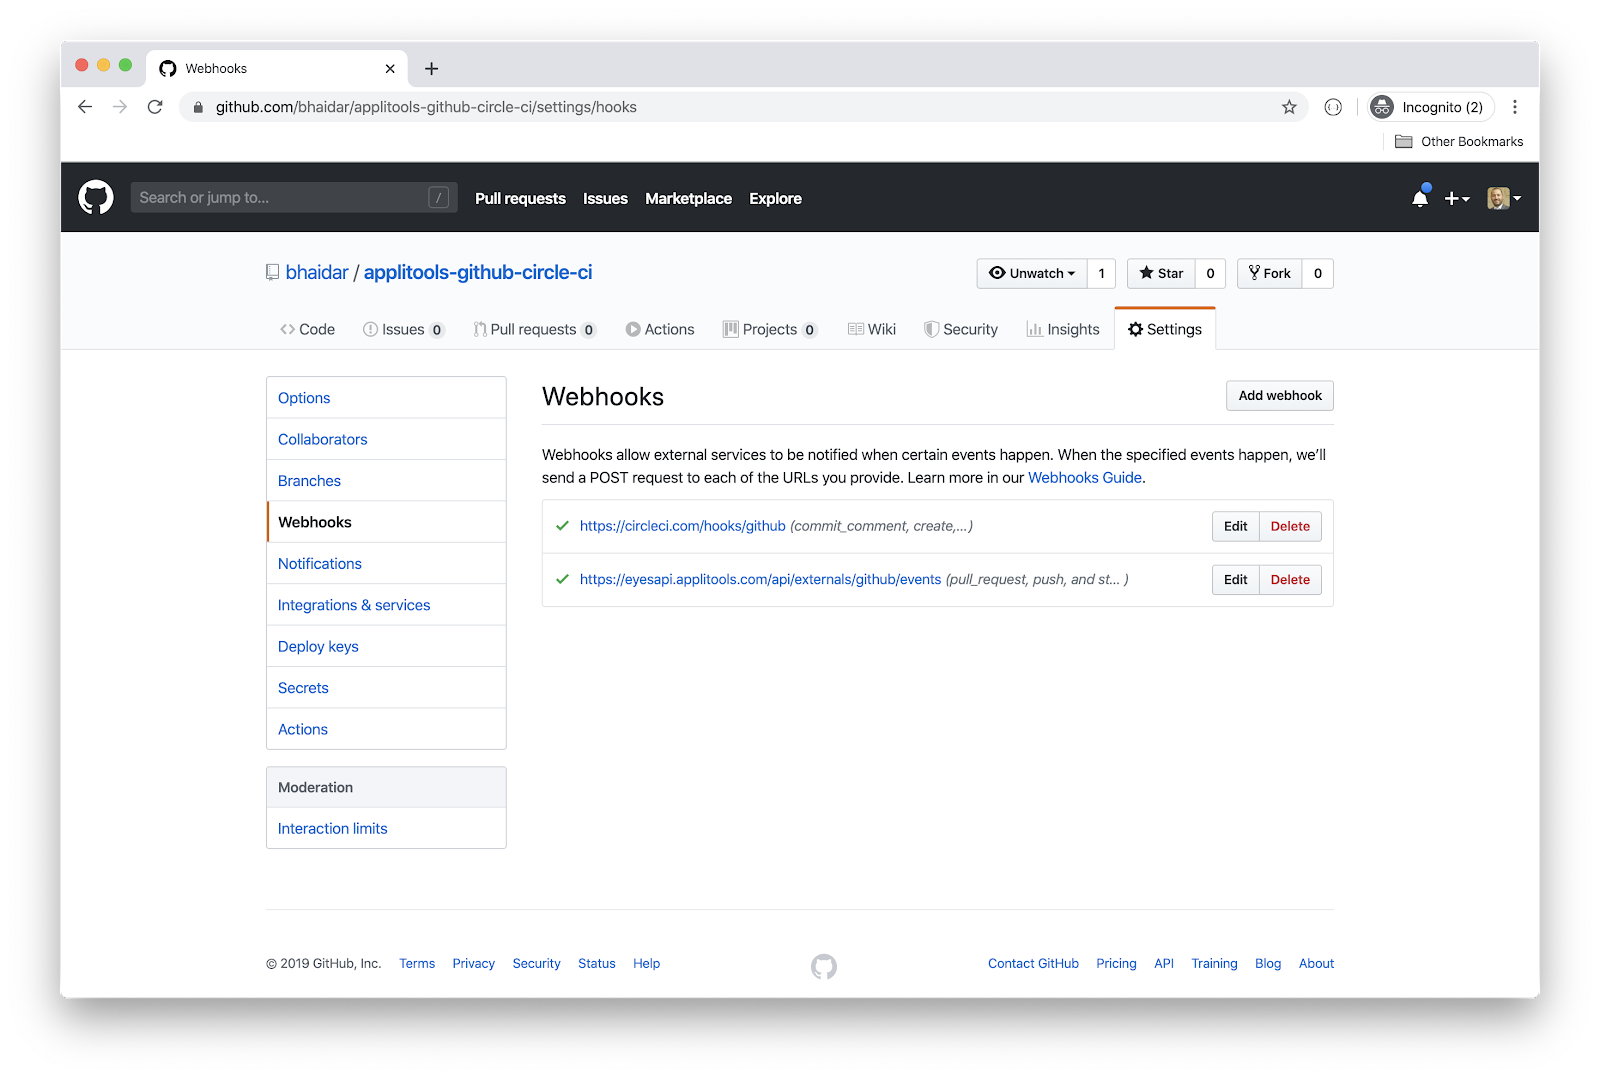
Now, if you navigate back to the GitHub repo Settings page and click the Webhooks menu item, you will see two Webhooks were added to your repo. One for CircleCI, and another for Applitools.
In this section, I will be fixing the single visual UI test script that I have by changing the ID names for all the fields on the SalesForce contact form so that the test runs successfully.
As mentioned previously in my articles, the recommended approach for doing visual testing with Cypress.io is to assign data-* attributes to fields. Such data attributes never change, and provide a consistent way to keep your visual tests running.
Since we don’t have control over the source code behind the contact form, I will simply create a new Git branch and fix the visual test code to reflect the new IDs being used.
Run the following commands to create a new branch in Git:
git checkout -b amend-visual-test-to-use-new-ids
git push --set-upstream origin amend-visual-test-to-use-new-ids
I’ll go through the script code and change the way I find input fields on the form:
// Fill First Name
cy.get('input[id="reg_form_1-UserFirstName"]')
.type('John')
      .should('have.value', 'John');
To something like this:
// Fill First Name
cy.get('input[id^="UserFirstName"]')
.type('John')
.should('have.value', 'John');
The new script code now looks like this:
Let’s give it a shot and run the single test, included in the source code, locally, and make sure it runs.
To run the test, we need first to open the Cypress Test Runner app by running this command:
npx cypress open
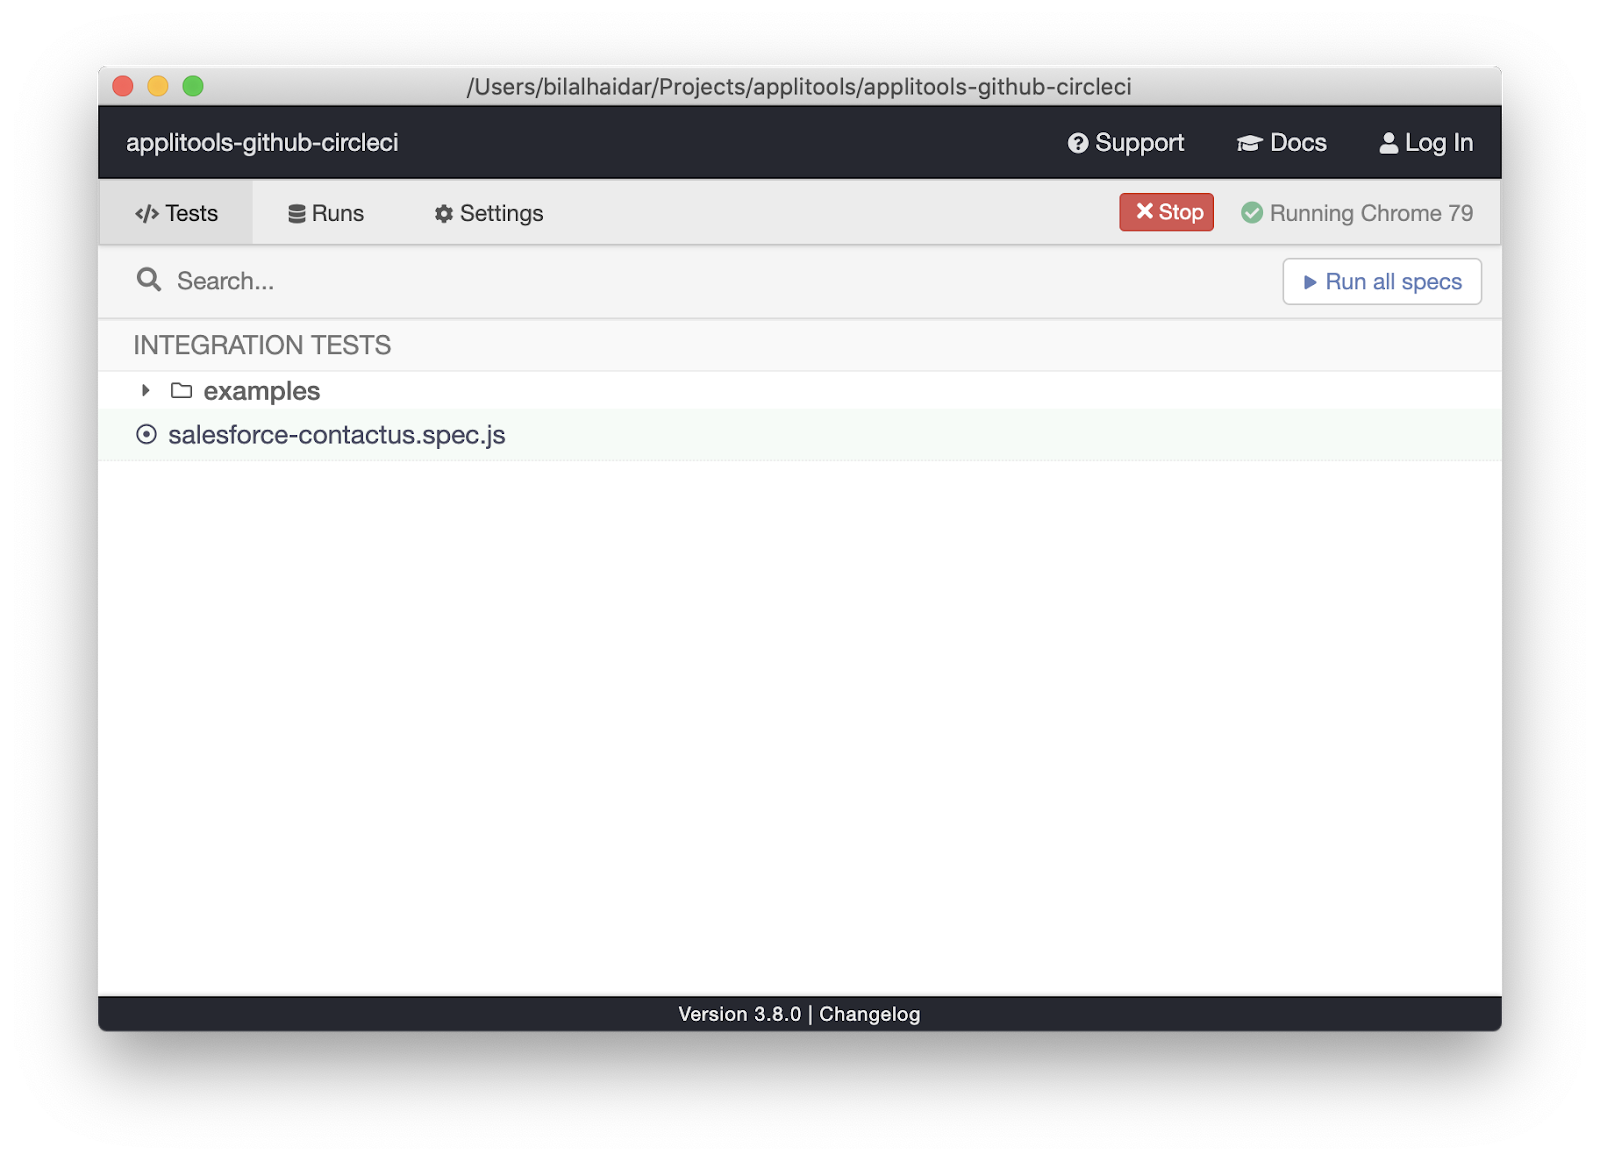
Click the salesforce-contactus.spec.js file and Cypress will run the test for you. The result is shown below:
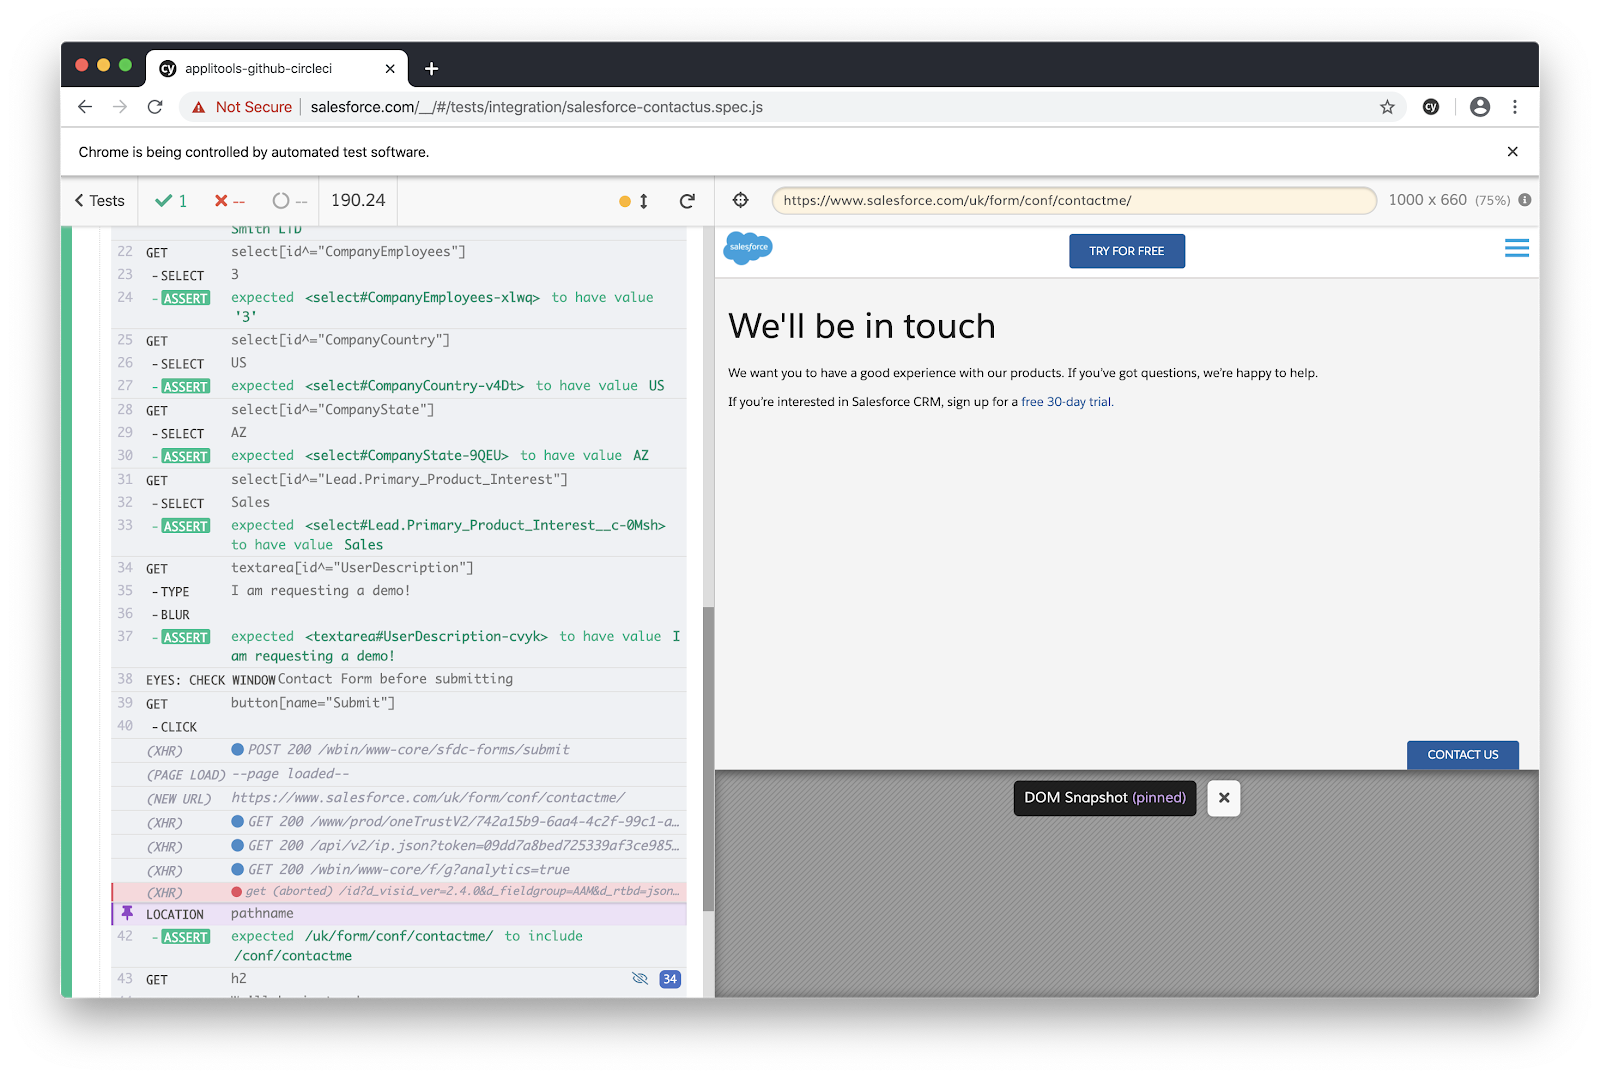
The test runs successfully! Let’s make sure the test results are displayed on the Applitools Test Manager website.
Let’s visit the Applitools Test Manager, and verify the results.
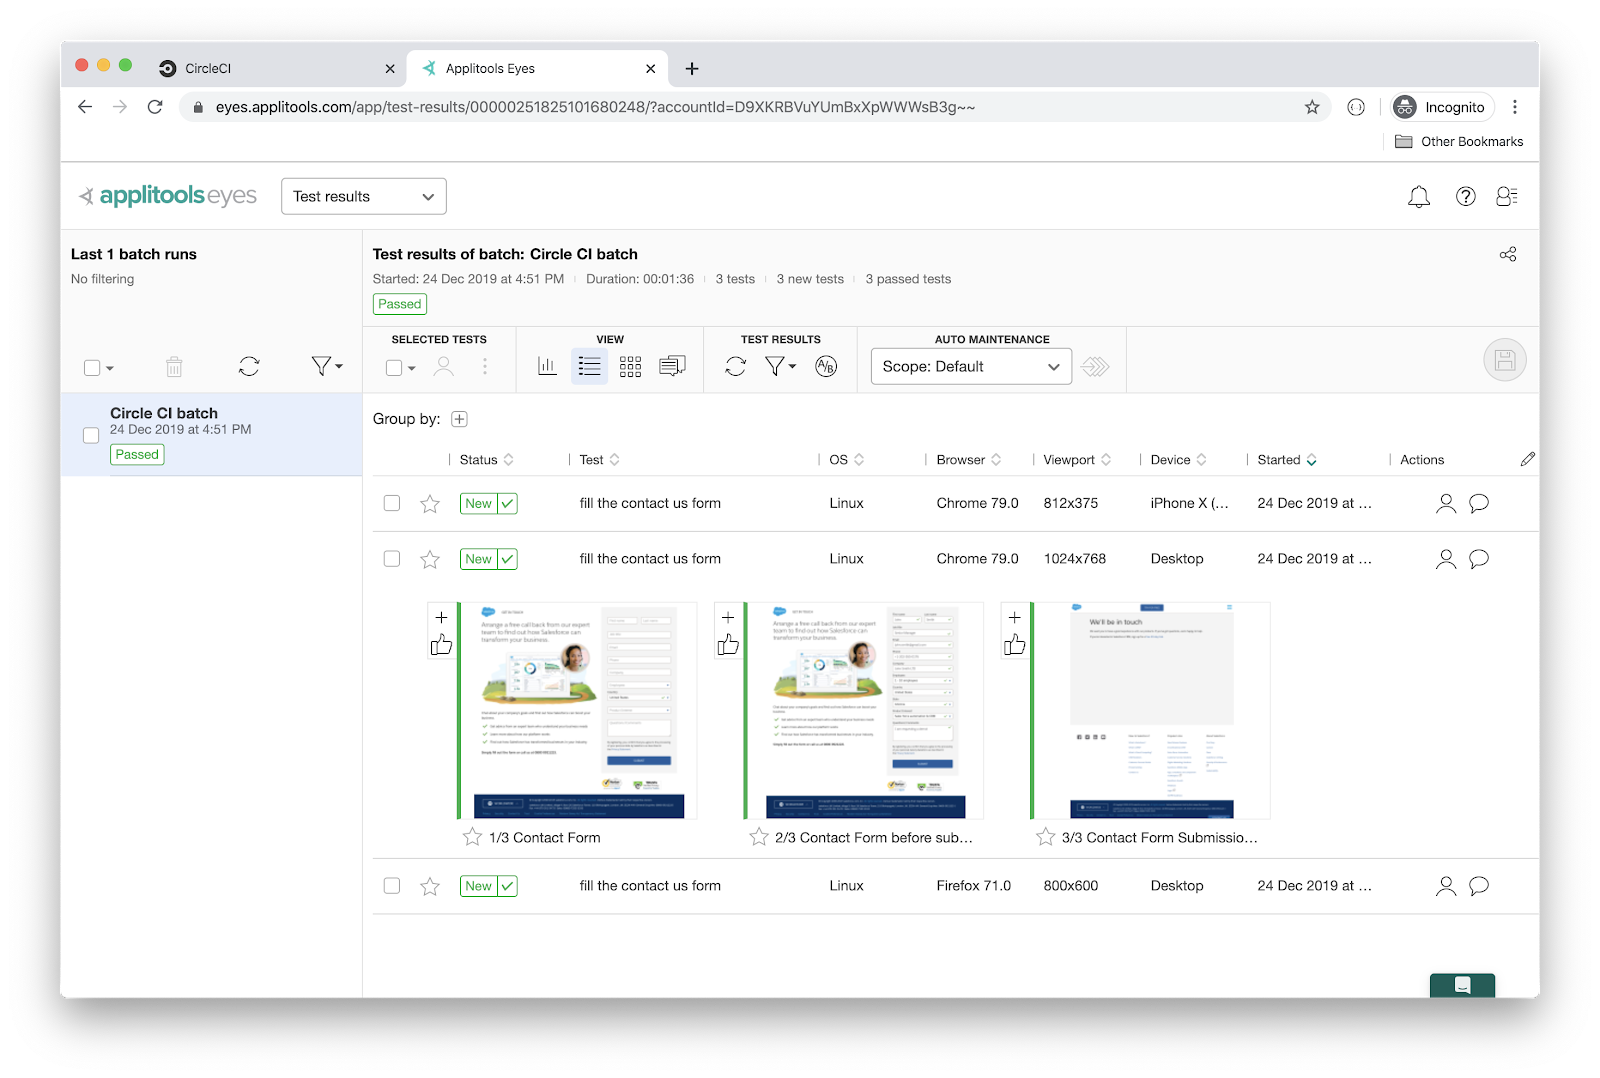
Great! Our test runs fine.
Now that our test runs successfully locally, what we need to do is push our new branch to GitHub, create a new PR and watch how CircleCI and Applitools will be triggered. Their status updates will appear on the PR itself on GitHub.
Run the following commands to push the new branch to Github:
git add .
git commit -m "Fix visual test script"
git push
Navigate to the GitHub repo, and create a new PR.
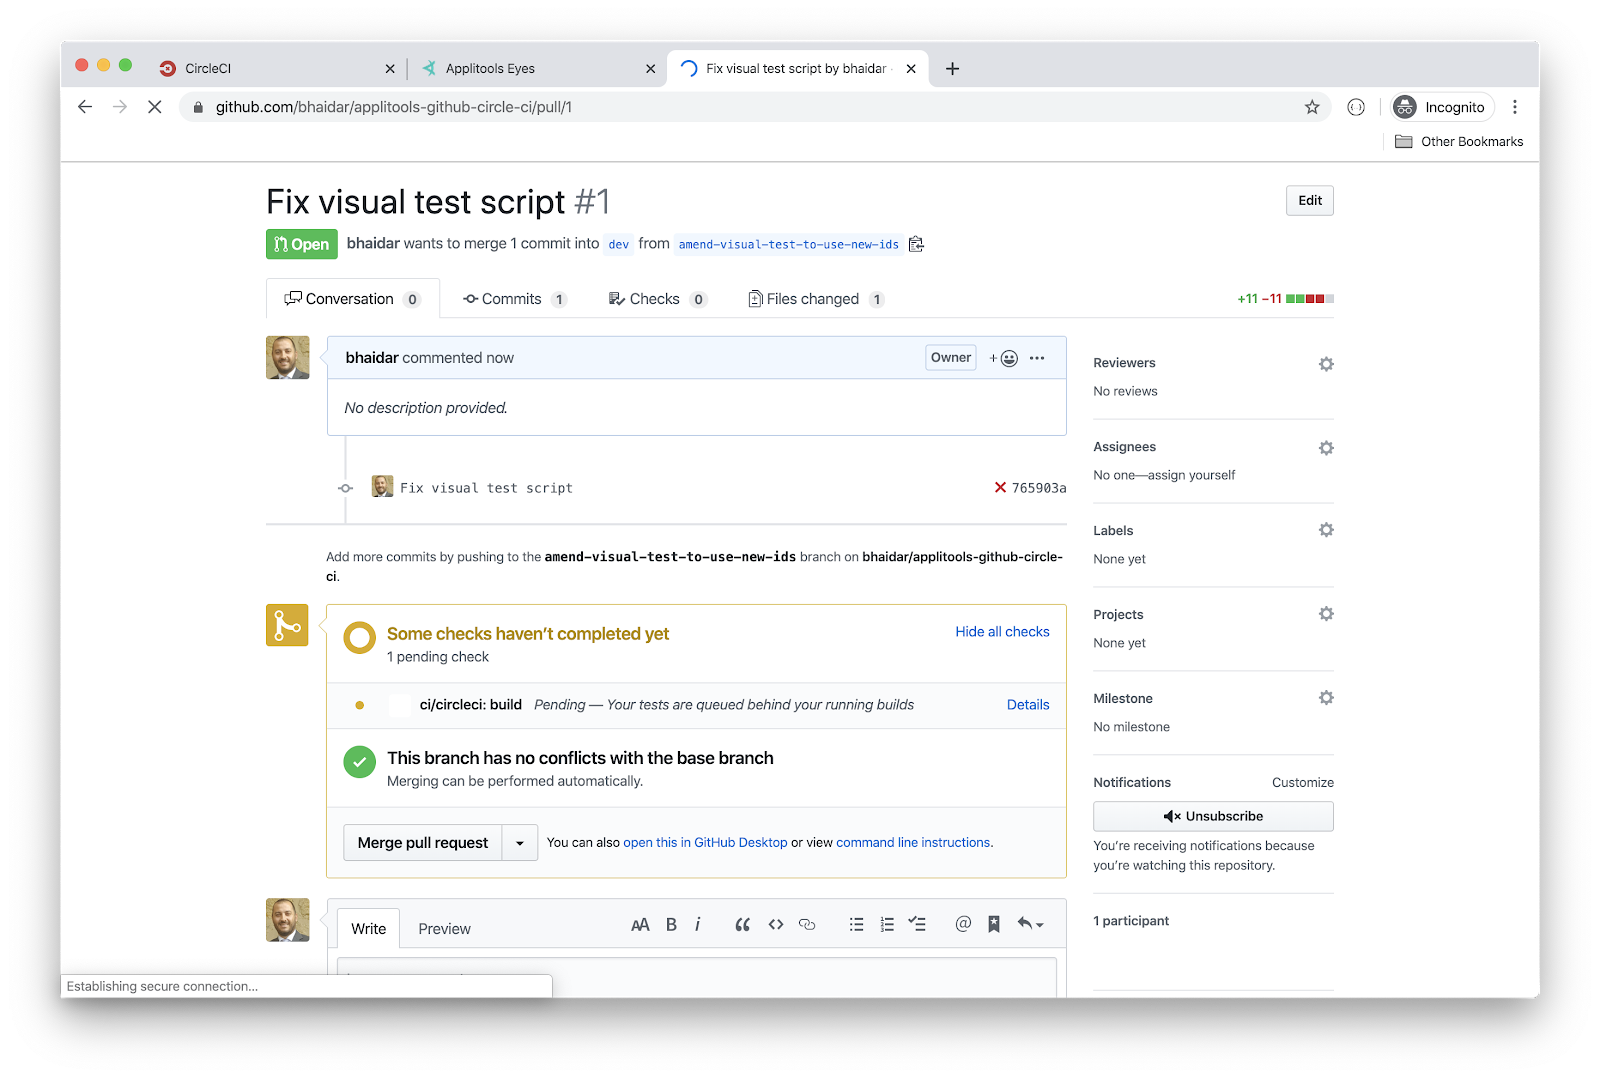
Notice how the CircleCI build pipeline has started:
ci/circleci:build Pending -- CircleCI is running your tests
Let’s wait for CircleCI to finish running the job and for Applitools to report the results of running the tests on this PR:
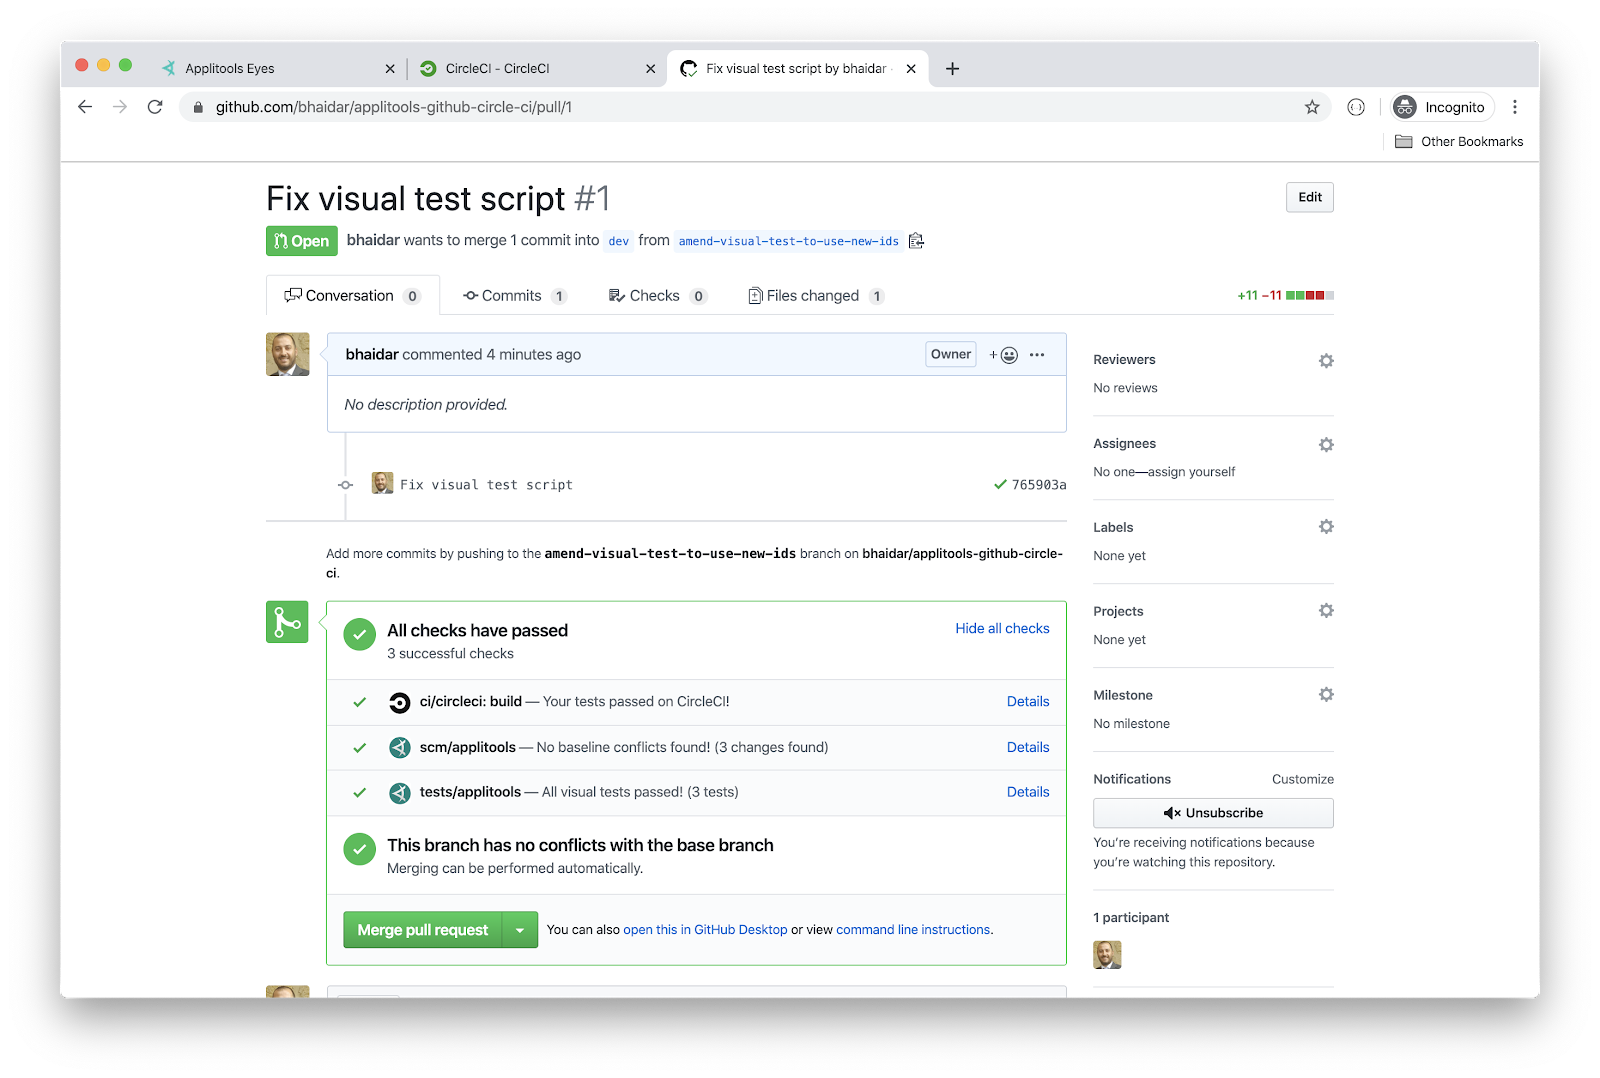
Both CircleCI and Applitools report success on running the single visual UI test!
Congratulations!
Only now you can go ahead and merge the PR into the source code.
This article is just the tip of the iceberg on how Applitools automated visual UI tests can seamlessly integrate with a CI engine to support and facilitate the DevOps workflow.
Now that you have a starting point, I will leave the floor to you. Explore,play and configure! Be brave and try more advanced workflows.