
As a Salesforce tester, if you’re unfamiliar with visual testing—don’t worry, you’re in the right place! This blog will walk you through everything from the basics of visual testing to practical Salesforce-specific examples. You’ll learn how to catch visual bugs that can break user trust and impact experience. By the end, you’ll be confident in applying visual testing to your Salesforce QA projects.
Let’s begin.
You are working on a team and have just deployed a great feature. The developer is happy with how it turned out, and the project manager is satisfied with the delivery. As a QA, you gave the green signal after testing—everything looked perfect. And the best part? The entire process went smoothly, without any escalations or last-minute issues.
That’s what successful teamwork looks like: the developer built it right the first time, the tester confirmed, and the client exclaimed, ‘This is great!’ It’s rare that things go so smoothly every single time.
Is everything really this easy? In practice, the real world likes to surprise us…
The deployment happened on Friday, and on Monday morning, you and your team received an email. In that email, the surprises begin to unfold. One by one, the bug reports start coming in.
Someone points out a couple of issues:
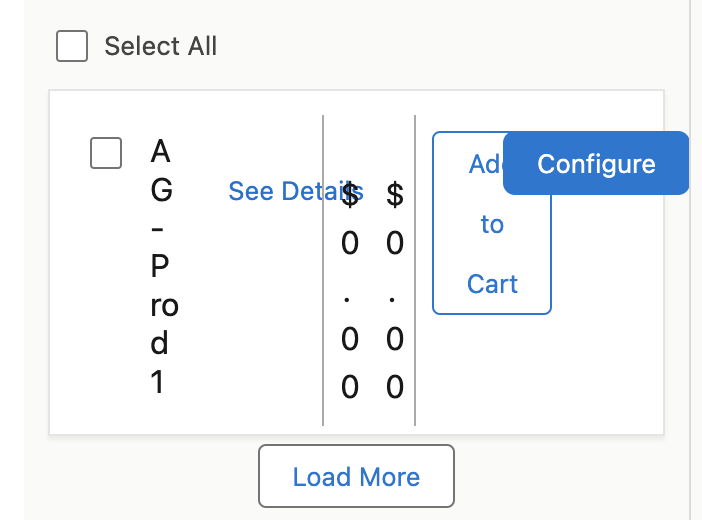
The first issue: the “Add to Cart” and “Configure” buttons overlap in the Salesforce CPQ cart, making it difficult for users to interact with them properly.
The second issue: a user reports that transparent PNG images do not display correctly on mobile devices when the ‘Optimize Images for Mobile’ setting is enabled in Communities.
What looked like a smooth and successful deployment is now showing signs of trouble.
As a Salesforce tester, visual testing means checking how the UI looks and behaves—not just whether it works.
You’re not just checking if buttons work or forms get submitted. As a Salesforce tester, you’re also making sure:
This is especially crucial in Salesforce, where small changes in configuration or access can lead to big differences in what users see.
We all know that Salesforce is a robust platform where a lot of emphasis is placed on configuration, customization, personalization, and a user-centric approach. Specifically, when we talk about Lightning Components and Experience Cloud, the UI can vary based on several criteria, such as:
As a Salesforce QA team member, you may write and update many test cases, and everything might seem to be running smoothly in terms of functionality. However, unless you check how it actually renders, you’re missing a huge part of the user experience.
At this point, we can’t afford to ignore visual testing or say we’ll deal with it later. It has become a necessity to ensure usability.
Here are some hard-learned reasons why Salesforce QA teams must take visual testing seriously:
Whether you’re testing Sales Cloud, Service Cloud, or an extensively customized Experience Cloud portal, these key principles apply:
Don’t underestimate visual appeal as part of user experience—in Salesforce, a flawless UI through visual testing can be the difference between closing or losing a deal.
Visual testing is super helpful when it comes to making sure your Salesforce app not only works well but also looks right on different browsers, devices, and for different users.
In Salesforce, things like profile permissions, Lightning page setups, and screen sizes can change how components appear. That’s why visual testing is important—it helps you catch UI issues early.
It might seem tricky at first, but Salesforce testing with Applitools makes it easier. This blog gave you a basic idea of why visual testing matters to Salesforce QA teams and how you can get started. Now you’re ready to explore more and improve your testing process.
Salesforce QA teams can begin with visual testing by:
– Focusing on high-impact pages like CPQ carts or dashboards.
– Creating visual baselines by taking screenshots of key pages during UAT (User Acceptance Testing).
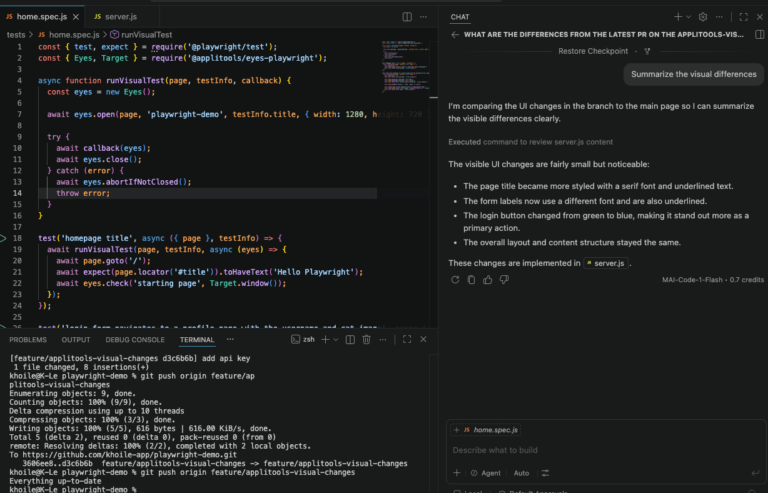
– Automating screenshot comparisons using tools like Applitools to detect UI discrepancies with each release.
– Involving the whole team in reviewing visual differences during pull requests.
– Educating the team on the importance of treating visual bugs with the same seriousness as functional bugs.
Common visual bugs in Salesforce deployments include:
– Overlapping buttons or elements.
– Incorrect display of images, especially on mobile devices.
– Layout issues due to variations in screen resolution or browser type.
– Incorrect field visibility based on user roles and permissions.
– Differences in UI between UAT and Production environments.
– Inconsistencies caused by third-party app integrations or Lightning component customizations.
While functional tests ensure that features work as expected, they don’t verify the visual presentation of the application. In Salesforce, UI can be highly dynamic and personalized, with elements appearing or disappearing based on configurations.
Functional tests alone might pass even if the layout is broken or if elements are not displayed correctly. Visual testing complements functional testing by ensuring the UI is both functional and visually appealing, leading to a better user experience.
Salesforce has a regular release schedule with three major updates per year. These updates often include UI changes, new features that can impact existing layouts, and sometimes the removal of older features, all of which can lead to unpredictable UI behavior.
This high frequency of updates makes visual testing essential. Without it, issues like layout shifts, unexpected field visibility, and broken components can easily slip into the production environment. Visual testing ensures that these changes are reviewed and verified, helping maintain UI consistency despite the ongoing updates.
Salesforce has three major releases per year, each potentially introducing UI changes, new features that impact layout, and sometimes the removal of existing features. This makes the UI unpredictable.
Applitools helps by automatically detecting visual differences between releases, ensuring that any unintended changes are caught before reaching production. This is especially useful because functional tests might pass even if the UI layout is broken or if elements are not displayed correctly. Applitools provides a safety net, validating that the UI looks right and functions correctly, regardless of Salesforce’s frequent updates.