Add Visual Testing to Your AI Workflow with the Applitools MCP Server
If your team is using AI assistants to generate code, you have a specific problem that’s easy to miss until it’s expensive: the same probabilistic system writing your code is also the one most likely to write tests that confirm it works.
That’s not a testing strategy. That’s a rubber stamp.
The Applitools Eyes MCP server puts a deterministic visual check inside the tools your developers already work in (VS Code, Cursor, Claude Desktop) so you catch what agent-generated code misses before it merges.
The problem with LLMs testing LLM-generated code
Here’s what the failure mode looks like in practice.
Your developer gives a spec to Cursor. It generates a feature, writes unit tests, and the tests pass. Nobody’s reading every line when an agent produces 400 lines in three minutes. Three other developers did the same thing this sprint. Now, four branches of agent-generated code land in integration, each with tests written by the same probabilistic model that wrote the code.
What you don’t have is any external reference point. The agent doesn’t know that “FDIC insured” became “FDIC assured” somewhere between the last baseline and this build. It doesn’t know the account label changed from “Premier Checking” to “Gold Checking” on the page your highest-value customers see first. It generated tests against what it produced, and those tests passed because the expectation and the output came from the same source.
Visual AI and a deterministic language model don’t drift with context or prompt variation. They compare against a known-good baseline and flag anything that diverges. That check happens inside the IDE where the code is being written, before anything is merged.
What the MCP server does
The Applitools Eyes MCP server connects AI assistants to Applitools Eyes via the Model Context Protocol. It currently supports the Playwright JavaScript/TypeScript Fixtures SDK only. Selenium, Cypress, and WebdriverIO are not supported yet. Requires Node.js 18 or newer.
Works with: VS Code, Cursor, Claude Desktop, Claude Code CLI, Cline, and any MCP client that accepts standard studio configuration.
Six tools ship with the server:
eyes_verify_api_key— Validates your API key and checks server connectivity. Searches your environment variables, .env, and config files automatically.eyes_setup_project— Sets up Eyes in your Playwright project, including the Eyes reporter that extends the native Playwright HTML report so you can accept or reject diffs without opening the dashboard separately.eyes_add_checkpoints_to_test— Adds visual checkpoints to existing tests following best practices. Visual assertions replace locator-based functional assertions where appropriate, giving you fewer lines of code to maintain when the DOM shifts.eyes_setup_ufg— Configures the Ultrafast Grid for cross-browser and cross-device testing across multiple browsers and viewports simultaneously.eyes_fetch_visual_results— Returns structured results: batch name, test names, and statuses (passed, failed, new, unresolved) directly in your IDE.eyes_get_batch_url— Parses test output to return a batch URL for the Eyes dashboard when you need to review diffs, set ignore regions, or log bugs to Jira.
What the workflow looks like
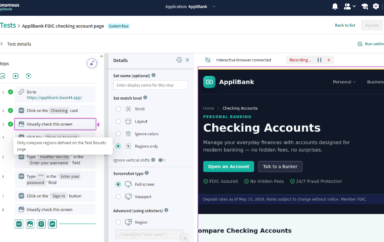
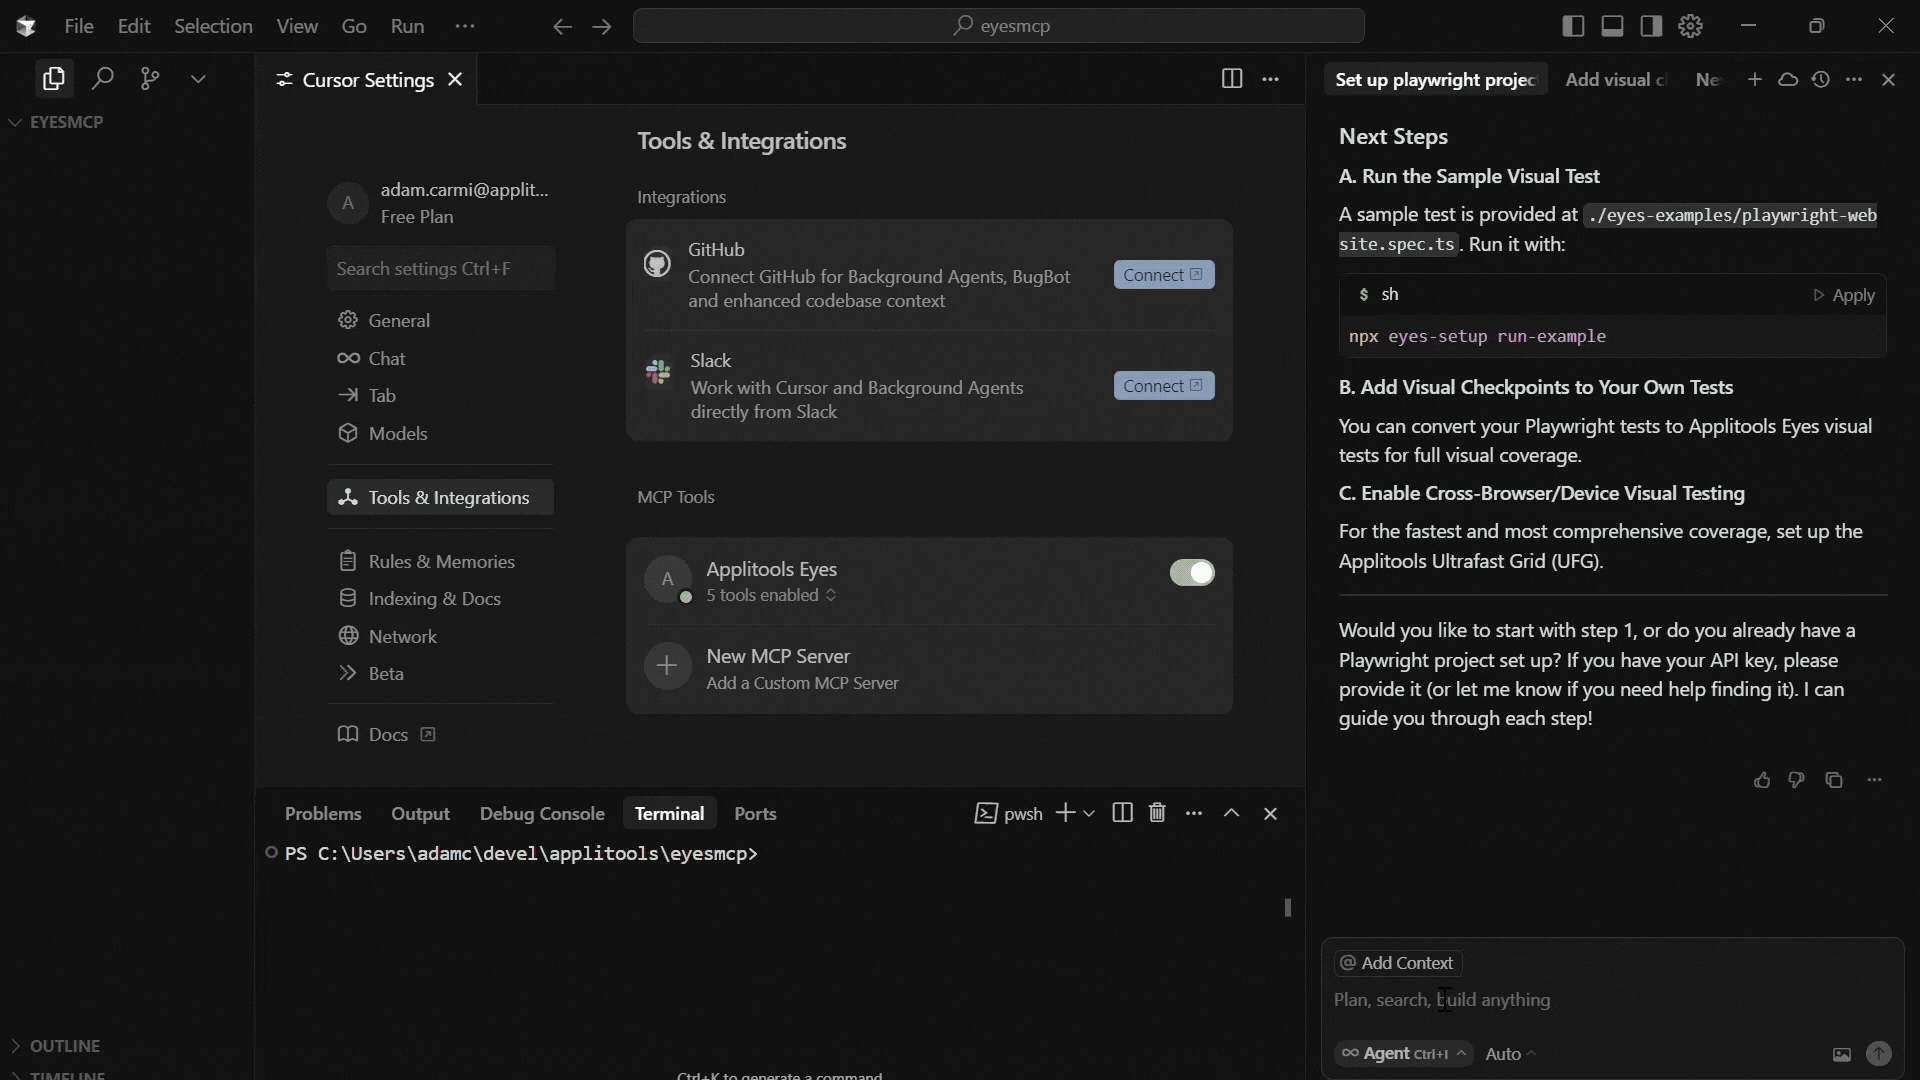
You open your Playwright project in VS Code. With the extension installed, tell your AI assistant: “Set up Applitools Eyes for my project.” It reads your playwright.config.ts, installs the SDK, adds the reporter, and sets recommended defaults without you touching the documentation.
Then point it at a test file: “Add Eyes visual checkpoints to my login.spec.ts.” It reviews your test structure, suggests checkpoint placements, and replaces locator-heavy assertion blocks where visual validation is more stable. You review the proposed changes and accept what makes sense.
Run your tests. Results appear in the Playwright HTML report. Any visual differences surface as diffs. From there, you get a batch URL for the Eyes dashboard if you need to dig deeper.
Set up visual coverage on an existing test suite: minutes.
How to install
VS Code or Cursor (recommended): Search “Applitools MCP” in the extensions marketplace. The extension manages the server automatically and connects it to GitHub Copilot or Cursor’s AI assistant.
Via the VS Code CLI:
code --add-mcp '{"name":"applitools-mcp","command":"npx","args":["@applitools/mcp@latest"]}'Any other MCP client:
{
  "mcpServers": {
    "applitools-mcp": {
      "type": "stdio",
      "command": "npx",
      "args": ["--yes", "@applitools/mcp@latest"]
    }
  }
}
Try it out
The fastest way to see what the MCP server does is to point it at a Playwright project you already have.
Install the extension in VS Code or Cursor, open an existing test file, and ask your AI assistant to add visual checkpoints. You’ll have Eyes coverage on a real test in under ten minutes.
Get started with a free Applitools account — no credit card needed.
Quick Reference
Playwright JavaScript/TypeScript Fixtures SDK only, as of this writing. More frameworks are coming.
VS Code (with Copilot), Cursor, Claude Desktop, Claude Code (CLI), Cline, and any MCP client that accepts standard studio configuration.
No. The MCP server guides setup and augments your workflow. The underlying Playwright Fixtures SDK still powers test execution. Think of MCP as removing the friction from getting Eyes into a project, not replacing how it runs.
No. The extension is the easiest path, but manual npx configuration works with any MCP client.