Give Your Optimizely Devs (and Agents) Visual Guardrails to Prevent Bugs. Save your spot for the Oct. 29th webinar

Give Your Optimizely Devs (and Agents) Visual Guardrails to Prevent Bugs. Save your spot for the Oct. 29th webinar
For anyone trying to automate repetitive and time-consuming tasks, Microsoft has just quietly released a free tool that will make your life easier. Power Automate Desktop is a codeless tool that arose out of their Softomotive acquisition a year ago. Now fully integrated into Windows, it is available for free to all Windows 10 users.
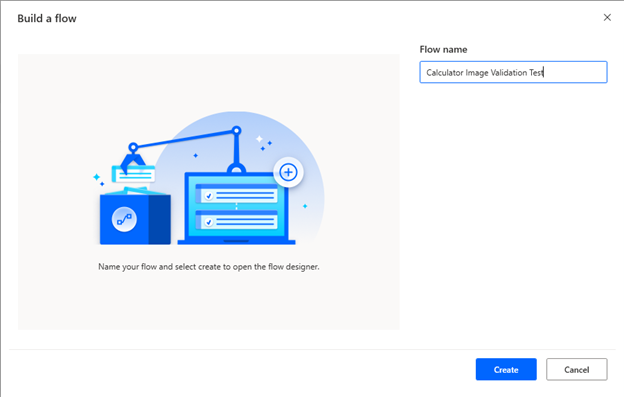
In this step-by-step tutorial, we’ll learn how to use Microsoft Power Automate Desktop to automate an application without code. We’ll even learn how to codelessly test it visually too.
So what can be done with Power Automate Desktop? A better question might be, what can’t you do with it? Power Automate Desktop provides many already pre-built “Actions” to automate many different processes or applications out of the box. For example, you may want to automate sending an email triggered by a particular event. Or you may want to extract values from an Excel spreadsheet and store them somewhere else like a database on Azure. If so, Power Automate Desktop has you covered along with hundreds of other similar actions. If an action you need doesn’t exist, no problem either. It’s easy to create one – so let’s go ahead and do so!
For the context of this example. Let’s say you’re a tester and you’ve been tasked to automate your Windows desktop application. Where do you start!? You could go down the path of using a framework such as WinAppDriver, which is an Appium driver built and maintained by Microsoft to automate desktop Windows applications. However, with this approach you will need some coding experience and some knowledge of the framework to really provide a viable solution. There are other enterprise options such as Micro Focus’s UFT One, formally named QTP/UFT. But this too requires some coding knowledge to be successful, along with a hefty paid subscription.
The beauty of Power Automate Desktop is that, not only is it completely free, but it can be 100% codeless and no coding knowledge or background is required. A Web and Desktop recorder is built in to record any UI elements or views you need to interact with for your automation, which can easily be plugged into your “Flow.” A Flow in Power Automate Desktop is essentially the same thing as “automation script” in the coding world.
For this example we are going to use a very simple application: the Calculator app.
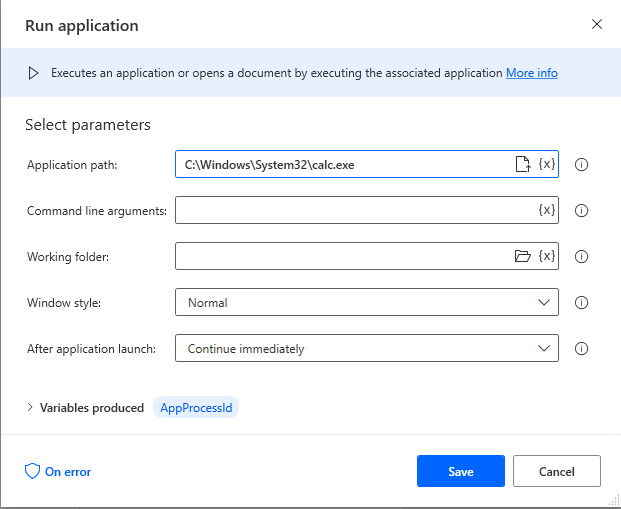
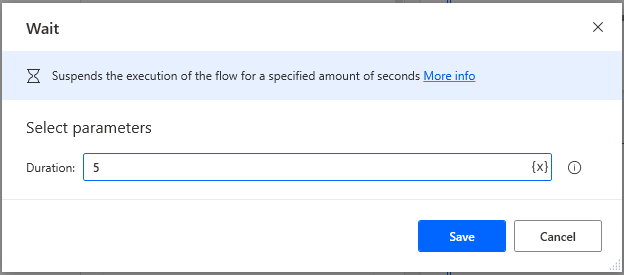
Tip! Whenever you screenshot your application, make sure the application window is isolated (preferably with a dark background) and not overlapping any desktop icons or other windows. This will provide a much better image result.
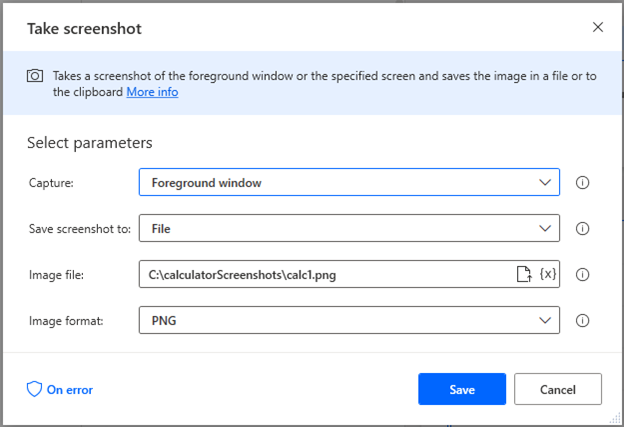
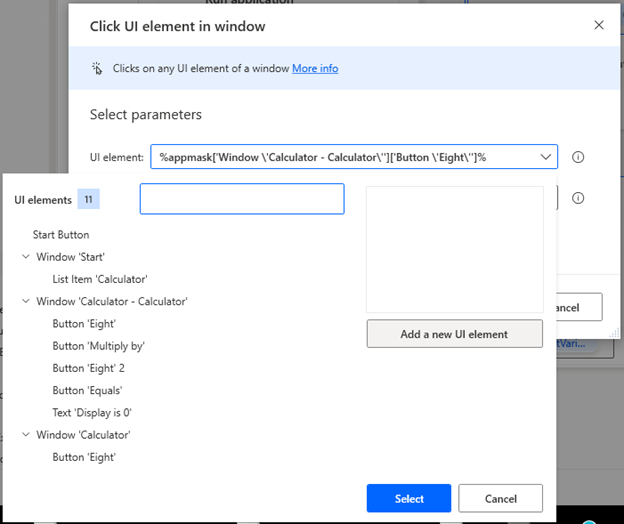
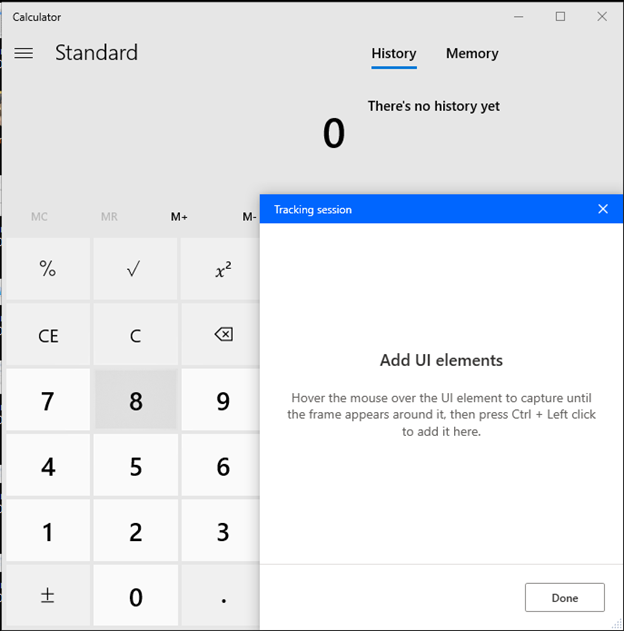
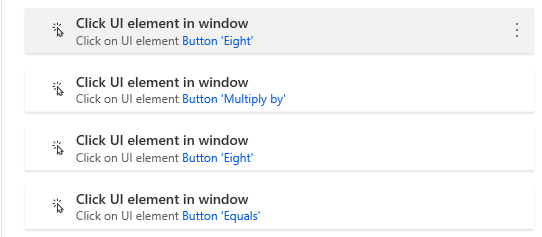
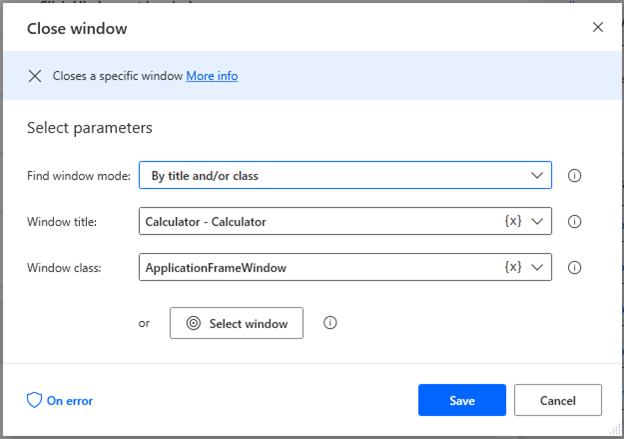
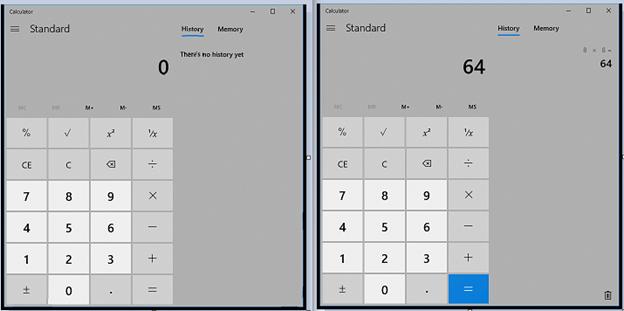
So now let’s say you want to visually validate your desktop application with Applitools using our AI image comparison algorithms. But why would you want to visually validate your application?
Well the old saying goes “A picture is worth a thousand words.” That cannot be any truer than when it comes to testing. Factor in that in today’s software development world, the pace of releasing software updates is drastically increasing. A visual snapshot of your application can uncover bugs, visual discrepancies or layout issues you never knew existed and also ensure your Application’s UI still works and is functional.
Like in this example, if 8×8 didn’t equal 64 we’d know right away something was wrong because the screenshot would look different. With an image, every visual attribute (text, color, location, etc..) of every element is automatically captured.
So lets add an action to upload our screenshots we took above to Applitools!
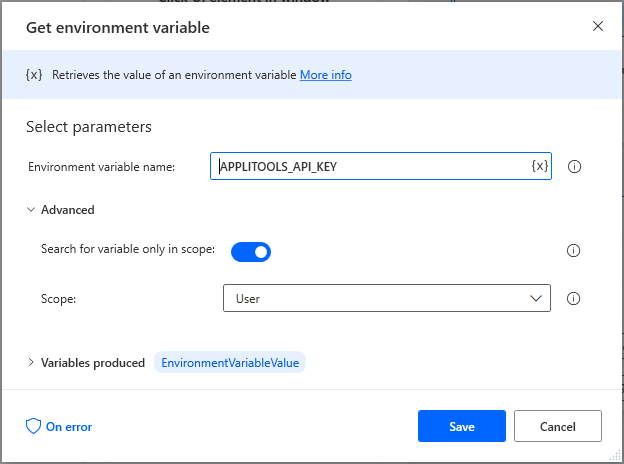
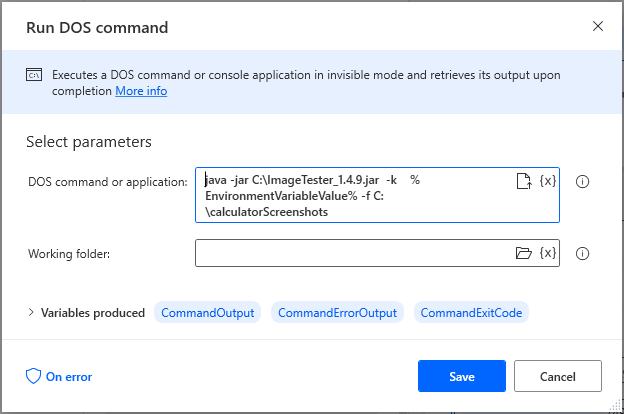
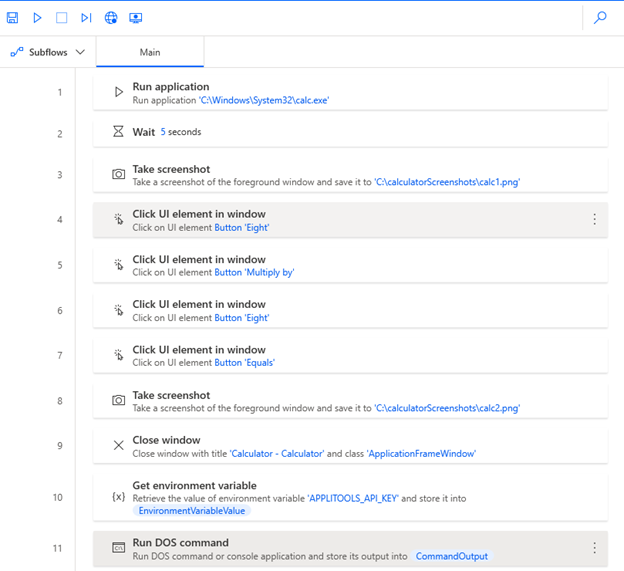
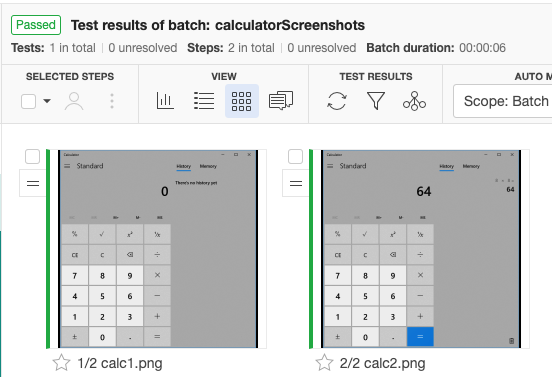
And that’s it! You now have stored baseline images of your application. So whenever your development team makes changes to your application in the future you can run this Power Automate Desktop Flow again to ensure your application still functionally works the same but is also visually perfect!
You can see the full Flow in action in the video below:
Applitools comes with many amazing features such as CI/CD integrations, bug tracking and accessibility testing, just to name a few. Visual testing with Applitools will help you improve your overall software quality, test smarter and more efficiently, and release application updates faster without sacrificing quality. Applitools is free so join Applitools today and see for yourself.
And don’t forget to download Power Automate Desktop and play around with it now that it’s available. Happy testing!
Power Automate Desktop is a free, codeless tool provided by Microsoft for automating repetitive tasks and application processes. It offers pre-built actions for tasks like automating workflows, extracting data, and interacting with desktop and web apps, all without requiring coding knowledge.
To start, download and install Power Automate Desktop on your Windows 10 machine. You can then create a new Flow, which is essentially an automation sequence, and use the built-in recorder and actions to define your automation steps.
Yes, you can use Power Automate Desktop to test desktop applications without writing code. By creating a Flow that interacts with application elements like buttons or inputs, you can automate and validate functional workflows.
You can use Power Automate Desktop to take screenshots of your application during the automated Flow. By integrating Applitools’ ImageTester tool, these screenshots can be uploaded and compared using AI-driven visual testing to detect UI differences or bugs.
The main advantages include its free availability, ease of use with no coding required, and built-in tools for recording actions and interacting with UI elements. It also integrates with other tools like Applitools for enhanced testing capabilities.