Give Your Optimizely Devs (and Agents) Visual Guardrails to Prevent Bugs. Save your spot for the Oct. 29th webinar

Give Your Optimizely Devs (and Agents) Visual Guardrails to Prevent Bugs. Save your spot for the Oct. 29th webinar
To better understand the Applitools Storybook SDK for Angular, here is a tutorial on how to build a small AngularJS application from scratch, adding some Storybook stories, and then finally performing visual regression testing using the Applitools SDK to generate snapshots for us to view and analyze.
You can find the source code for this article on GitHub by following this link storybook-angular-applitools repo.
Make sure you have the latest Angular CLI installed. In my case, I will be using the Angular CLI v7.0.2. Create a new Angular App using the following npm command:
https://gist.github.com/bhaidar/4574d49ed3ac7cea3280cfe6699475a0
The ContentEditable component we are going to build in this section wraps an HTML <div> element and adds an HTML attribute of contenteditable=”true”. The component implements the ControlValueAccessor so that the component can be used like any other Angular form control inside HTML forms.
https://gist.github.com/bhaidar/e37761b59c17ccff39a0a2e1826189c3
The HTML fragment above renders in the browser as an editable area that users can click and enter any text or HTML.
Create a new component file and add the following markup to contenteditable.component.html file:
https://gist.github.com/bhaidar/c33d6ef5ccb85a2217501662d7547ab1
Next, add the code below to the contenteditable.component.ts file:
https://gist.github.com/bhaidar/26e319b72dab27eacf1cf70d79d0cdef
The component is straightforward and follows the best practices in building a ControlValueAccessor. It defines a single @Input() property to allow the consumer of this component to control its styling.
If you want to fully understand how ControlValueAccessor works in Angular check out Max’s article titled Never again be confused when implementing ControlValueAccessor in Angular.
Next, add the following HTML snippet to the app.component.html file:
https://gist.github.com/bhaidar/ea4d556629040f0cd2c62044a243371e
Define the styles() method inside the AppComponent class:
https://gist.github.com/bhaidar/ec6971db0087b06dba36ef448dd5132b
And now run the application. You should see something similar to this below.
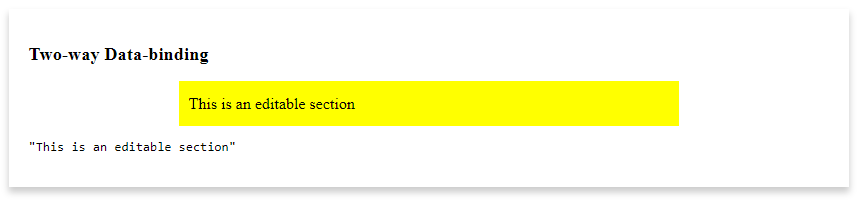
You can start typing in the yellow editable rectangle and you will see whatever you type underneath.
Let’s switch gears and add Storybook to the application.
We need to add Storybook for Angular to your application. The Storybook website offers a detailed installation guide on Storybook for Angular. Once installed, apply the following changes, so that Storybook runs correctly with your Angular 7 application.
Open the src/app/tsconfig.app.json file and make sure the exclude property has the following values:
https://gist.github.com/bhaidar/358f9995452ed969ea07a9fede8bc17d
Open the .storybook/tsconfig.json file and paste the following:
https://gist.github.com/bhaidar/cc70b2a8d80ed2dcaecf3294bfa10ad6
Add the following Storybook stories into the file located at src/app/stories/index.stories.ts:
https://gist.github.com/bhaidar/301128af1da165b2ef9f69063e12a616
The first story renders the ContentEditable component with a yellow background. While the second renders the component with a red background.
Run the Storybook tool to view and test your stories by issuing the following CLI command:
https://gist.github.com/bhaidar/a1a822903f5a22dc22662598c713d738
You should be able to see something similar to this:
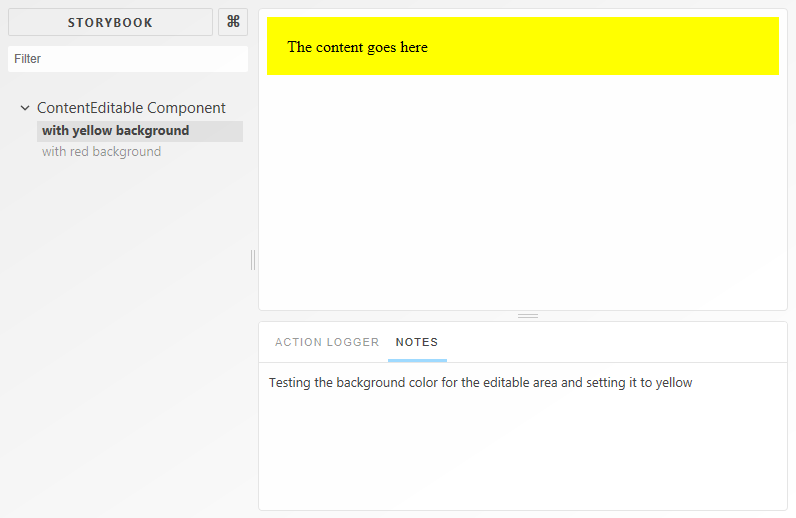
Now that we are sure the Storybook stories are up and running, let’s set up Applitools to use these stories and run our visual automated tests.
To add Applitools Storybook SDK for Angular to this application issue the following CLI command:
https://gist.github.com/bhaidar/b4afada02f704afdd1a5620f12b8c0d7
Make sure to grab an Applitools API Key and store it on your machine. For a complete tutorial on how to install and run Applitools Storybook SDK for Angular, you may check this link: Storybook Angular Tutorial.
To run the Storybook stories and send the snapshots to the Applitools Server, issue the following command:
https://gist.github.com/bhaidar/78649c5471387d891caa55ef3d382dbd
The command simply opens the Storybook stories, runs them one by one, and then sends all the DOM snapshots to the Applitools Server.
Let’s have a look at the test results inside Applitools Test Manager.
We can see the results of the tests we just ran from the Applitools Test Manager. To access the Applitools Test Manager, navigate to https://app14743.cloudwayssites.com. Sign in to get onto the Dashboard.
For a detailed look at the Applitools Test Manager, you can check this article: Applitools – The automated visual regression testing framework.
The results for running the Storybook tests show the following:
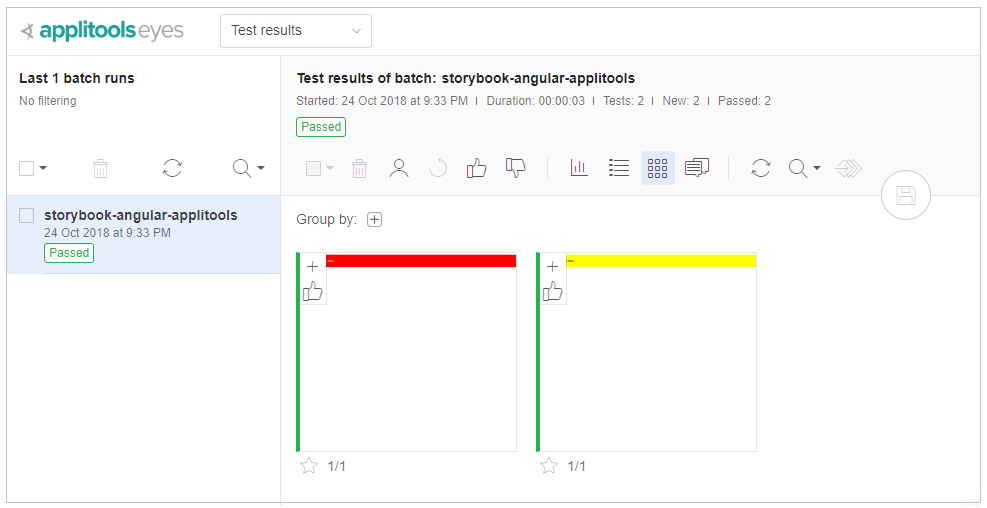
The test manager lists the test runs or batches (as referred to by Applitools) on the left- hand side. Clicking on any of the batches displays all of the snapshots for all of the Storybook stories in your application.
Click on the first snapshot (the red color) to expand and review it in detail:
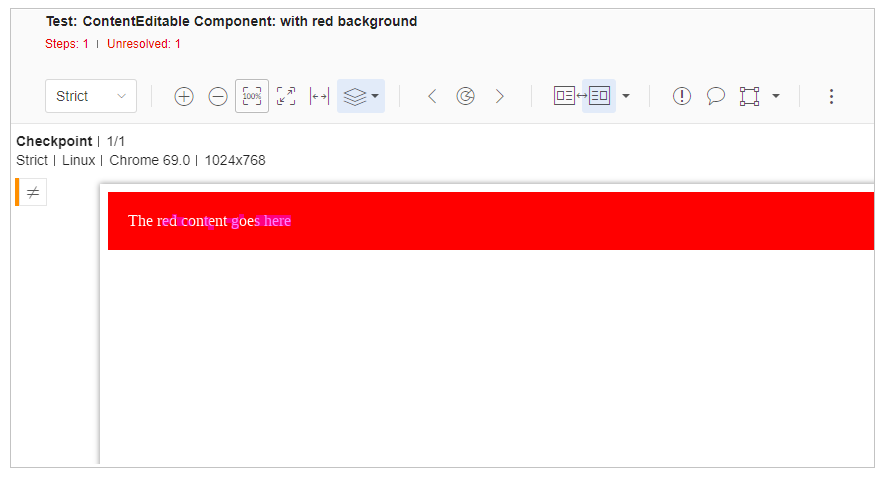
A rich toolbox is available to zoom in/out on the snapshot and compare this snapshot to any previously taken, known as the baseline. In this case, since this is the first time we are running the stories, there won’t be any baseline set. Therefore, Applitools Test Manager sets these snapshots as a baseline for upcoming regression test cycles.
Next, we’re going to simulate what happens when we have a visual regression in one of our components. To do this most easily, we’ll change one of our Storybook stories to render our component in a way that will be different from the baseline images we took earlier. Then, when we re-run the visual testing, we should see a discrepancy appear that we’ll have to resolve.
To do this, let’s assume that the story named in the red background above, has the ngModel value changed and now reads as follows:
https://gist.github.com/bhaidar/431450e0da98fb218354855b7cee82ab
Now run this command:
https://gist.github.com/bhaidar/78649c5471387d891caa55ef3d382dbd
The command gives you a detailed test result every time you run it. Check the following results:
https://gist.github.com/bhaidar/50472ea6d4d4c5478e09ad4c88c42946
Running the second story fails, as expected because we changed the content that was initially displayed inside the ContentEditable component. The test result output provides you with a link to check the discrepancies online. Click on the link to open the issues directly in the Applitools Test Manager:
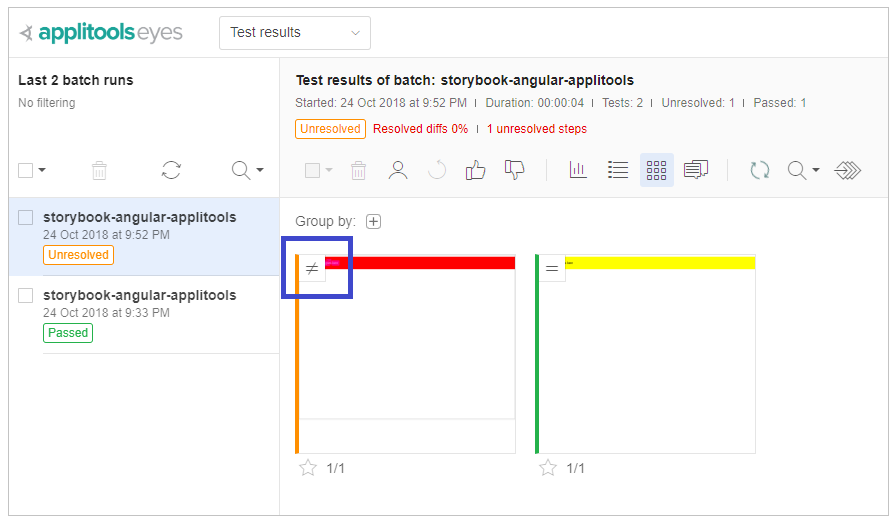
A new batch is displayed on the left-hand side with a status of Unresolved. The Unresolved status indicates that the Applitools Test Manager discovered a discrepancy between the two test runs. This will require your input in order to resolve the discrepancy. Either approve the difference, and create a new baseline, or reject it to keep the original baseline.
Notice the blue square above indicating the Not Equal sign. This means the second snapshot test run has some differences to the first test run snapshot (the baseline). Clicking on the first snapshot reveals the differences between both snapshots. The current one and the baseline. The differences in content are highlighted in blue. You can also compare the new snapshot with the baseline by selecting both:
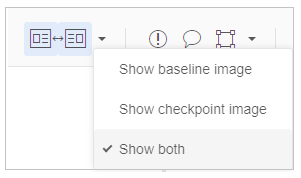
This should display both side by side and all differences are highlighted for you. You may spend more time at the Applitools Test Manager to explore all the rich features provided for you to do a thorough analysis on running the story tests.
This article touched the surface on how you can mix together Storybook and Angular together in one application. By means of Applitools Storybook SDK for Angular, you can provide automated visual UI testing by running the Storybook stories and generate snapshots that are then sent to the Applitools AI Server to compare and analyze and prepare the test results for you.
You can grab the code for this article by cloning the repository on Github.
So how are you going to test the Storybook components in your Angular apps?
This post was written by Bilal Haidar, a mentor with ThisDot